
The One Thing Nobody Tells You About 3D Needle Felting

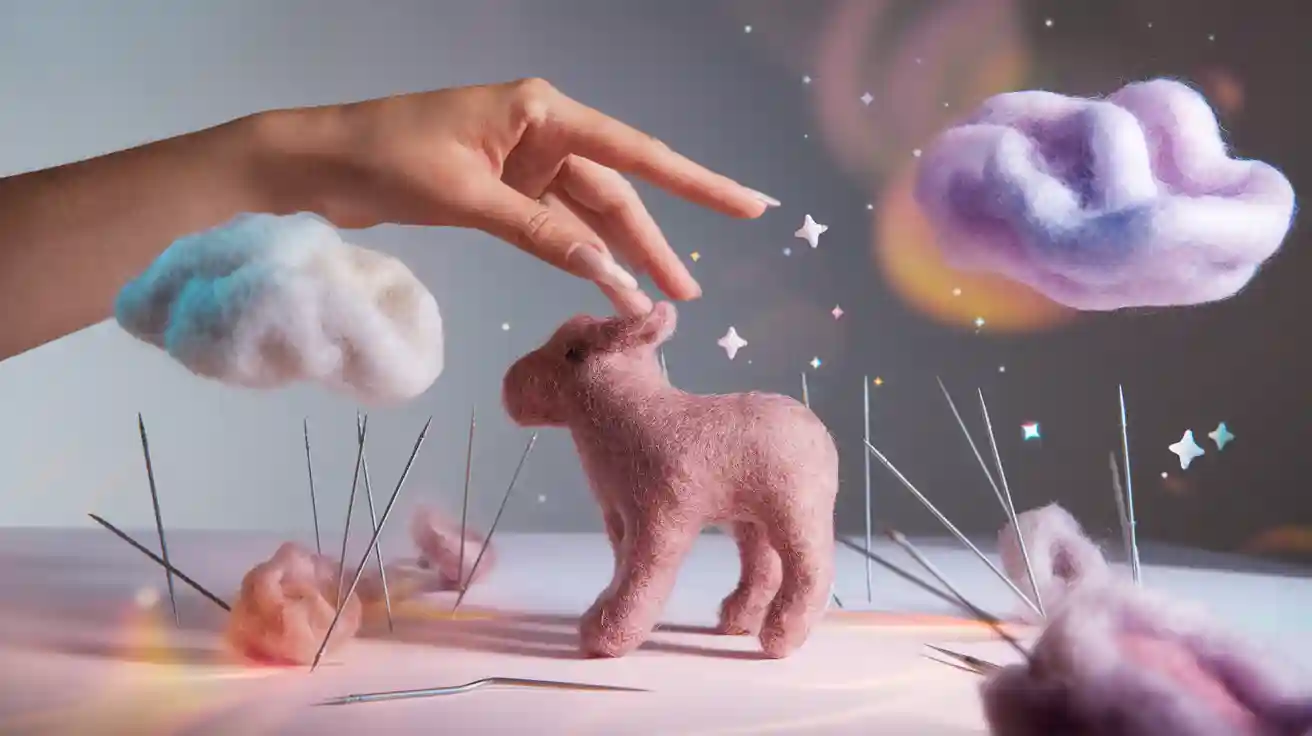
Here’s the secret nobody tells you about needle felting 3d: fiber preparation and layering make all the difference. If you jump right in, you might hit rough surfaces or break needles, and that leads to real frustration in needle felting. When you prep your fibers and layer them right, you see smoother shapes and lifelike results. Your pet portraits and keepsakes start to look amazing. Stick around for simple steps that will change your needle felting 3d projects for good.
Key Takeaways
Pick your fibers with care. Choose the best wool for the inside and outside. This helps your project look smooth and firm.
Build your sculpture slowly. Use thin layers that overlap. Mix colors to make it look real. This helps you avoid bumps.
Pick the right needles and tools for each part. Work with gentle, straight pokes. This keeps your needles safe and shapes your project well.
Look at your work often in good light. This helps you see rough spots or uneven shapes. You can also spot broken needles early and fix them with care.
Take your time. Do not worry about fixing mistakes. Add thin layers or fix problem spots. This helps your project look neat and professional.
Needle Felting 3D Basics
Core Materials
When you start needle felting 3d, you need the right materials for a strong and smooth result. Here’s what you’ll use most often:
A core made with a hard stick in the center and a soft foam cushion around it. The soft cushion lets your needle go in and out easily, so fibers tangle and hold together well.
The hard stick keeps your shape from bending or getting squished while you work. If the core is too hard, your needle might break. If it’s too soft, your project won’t hold its shape.
Some cores can be removed after felting, so you can make hollow or solid shapes.
Wool yarn is the best choice for felting. Its special fibers help you get a smooth, firm finish.
These materials help you build a strong base for your needle felting 3d creations.
Essential Tools
You don’t need a lot of fancy tools to get started with needle felting 3d, but a few basics make a big difference. You’ll want felting needles in different sizes for shaping and adding details. A needle holder lets you use more than one needle at a time, which speeds up your work and gives you more control. Always use a felting surface, like a foam pad or sponge, to protect your table and your hands. Fine or medium-fine wool works best for beginners because it felts quickly and gives a nice finish.
Professional artists often use two needles spaced about half an inch apart in a holder. This helps shape big areas fast. When you want to add tiny details, switch to a single needle for better control.
Key Techniques
Tip: Always start with thin layers of wool. Build up your shape slowly for the best results.
Use shallow pokes with your needle. This helps you avoid breaking needles and keeps your surface smooth.
Change needle sizes as you go. Big needles work fast on large shapes. Small needles help with details.
Turn your project often. This keeps the shape even and helps you spot any lumps or bumps early.
With these basics, you’ll feel more confident as you dive into needle felting 3d and start making your own lifelike creations.
The Overlooked Factor
Fiber Preparation
You might feel excited to start needle felting, but if you skip fiber preparation, your project can turn messy fast. You want your sculpture to look smooth and stay firm. Start with the right wool. Coarse wools like Corriedale or Romney work great for the core. They hold their shape and give your project a strong base. For the outside, use softer wool like Merino. This helps you get a smooth finish that feels nice to touch.
Pick the right needle for each step. Use a coarse needle, like size 36 or 38, to shape the core quickly. Switch to a fine needle, like size 40, for details and smoothing. If you want your sculpture to stand or pose, wrap craft wire with wool roving. This gives extra support. After you finish felting, use a fabric shaver to remove stray fibers. Your sculpture will look polished and neat.
Here are some tips for fiber preparation:
Use wool batts or carded sliver for easy shaping.
Try mixing different wools to find what works best for you.
Always start with a firm core before adding color or details.
If you notice your project feels too soft or starts to sag, you can repair it by adding more core wool and felting it firmly. This step helps you avoid problems later.
Layering Methods
Layering is where the magic happens in 3D needle felting. You build your sculpture one layer at a time. Each layer adds strength and detail. If you rush or use thick layers, you might see lumps or lines. To repair this, pull off the top layer and add thinner pieces, blending them in gently.
Let’s look at how layering works at each stage:
Layering Stage |
Wool Type |
Needle Gauge |
Needling Angle |
Density (g/cm³) |
Structural Impact |
|---|---|---|---|---|---|
Core Bulking |
Romney wool |
38-gauge |
45° spiral |
0.25 |
Gives bulk and grip; forms a stable base |
Muscle Shaping |
Corriedale |
38-40 gauge |
Vertical & horizontal |
0.35 |
Defines shape; adds firmness |
Surface Finishing |
Merino strips |
42-gauge |
85° |
0.45 |
Adds detail and smoothness; keeps surface stable |
When you layer, always overlap the wool slightly. This stops lines from showing. Blend colors to match your pet’s fur. Work in the direction the fur grows. Add layers slowly and check your work often. If you spot a rough patch, you can repair it by gently blending and felting more wool in that area.
Here’s a quick guide to layering for lifelike pet portraits:
Overlap wool layers to hide lines and lumps.
Blend colors for natural fur patterns.
Felt in the direction of fur growth for a soft look.
Add layers slowly to build depth and texture.
Save small bits of colored wool for special markings.
Finish with gentle blending and trimming for neatness.
If you ever see uneven spots or loose fibers, don’t worry. You can always repair these by adding a thin layer and felting it in place.
Why It Matters
You might wonder why fiber preparation and layering matter so much. The answer is simple: they decide if your sculpture looks lifelike or rough. When you prepare your fibers and layer them right, your project feels firm and looks smooth. You avoid common problems like lumps, sagging, or broken needles. If you skip these steps, you spend more time trying to repair mistakes.
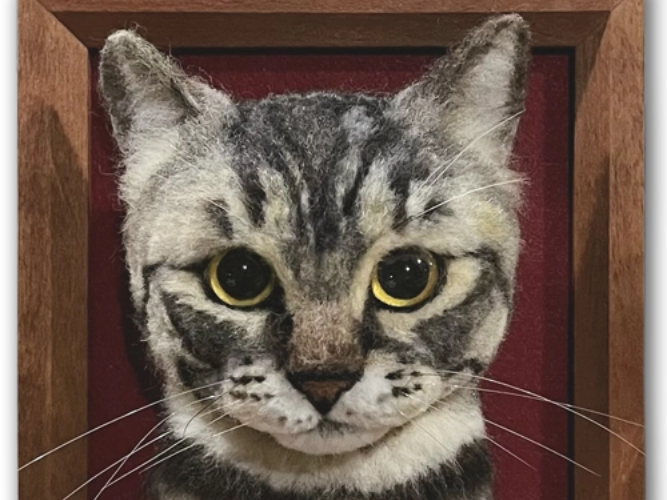
At Pawimprint, artists use these methods to create pet portraits and keepsakes that capture every detail. They blend colors, layer wool carefully, and use the right needles for each step. This is how they make each piece look just like your pet. When you follow these steps at home, you get results that make you proud. If you ever run into trouble, remember you can always repair your work by going back to the basics: prepare your fibers, layer with care, and take your time.
Tip: The secret to a great 3D needle felted sculpture is patience. Build up your project slowly, check your work often, and don’t be afraid to repair small mistakes as you go.
Common Problems
Rough Surfaces
You might notice your felted sculpture looks fuzzy or bumpy. This is one of the most common problems in 3D needle felting. Sometimes, you see large hole marks or even hairy patches on your finished piece. These issues often happen when you use thick layers of wool or poke too deeply with your needle. If you use a blunt needle, you may also struggle to smooth the surface. Try using thin layers and a fine needle for the final touches. A fabric shaver can help remove stray fibers and give your project a neat look. If you see undesired pattern marks, blend your wool more carefully and poke gently.
Tip: Always check your work under good lighting. You will spot rough spots faster and avoid extra damage to your sculpture.
Broken Needles
Needle breakage is a problem that frustrates many beginners. You might break a needle if you stab at an angle, use too much force, or hit a hard surface. Even experienced felters sometimes break needles, but it happens less often as you improve your technique. Here’s a quick table to help you avoid damage:
Cause of Needle Breakage |
What Happens |
How to Prevent Damage |
|---|---|---|
Needle snaps from sideways pressure |
Keep needle upright and straight |
|
Forcing the needle |
Too much force causes breakage |
Use gentle, steady pressure |
Hitting hard surfaces or wire |
Needle breaks on contact |
Use a proper mat and avoid wire |
Missed target leads to breakage |
Work in a well-lit area |
|
Wrong needle for the job |
Fine needles break on tough wool |
Use coarser needles for shaping |
If you notice your needle bending or not felting well, switch to a new one. Always grip the needle lightly and move it straight in and out. This helps you avoid extra damage and keeps your tools working longer.
Uneven Shapes
Uneven shapes can sneak up on you. You might see one side of your project shrinking more than the other. This happens when wool compacts at different rates. For example, the height of a felted finger might shrink more than the width, making it look lopsided. To fix this, make small samples and measure how much each part shrinks. Adjust your starting size before you begin felting. If you see your project going off-shape, add more wool to the thin spots and felt gently until it looks even. This step helps you avoid problems with the final look and prevents accidental damage to your hard work.
Remember: Most problems in needle felting can be fixed with patience and practice. Take your time, check your work often, and enjoy the process!
Fix a Felting Problem
Smoothing Techniques
You want your felted sculpture to look soft and lifelike, not rough or fuzzy. The right smoothing techniques can make all the difference. Here are some steps you can follow to fix a felting problem and get a polished finish:
Pick the right wool. Romney wool felts quickly and stays smooth. Merino wool feels soft but needs gentle handling.
Start with a dense, solid base. This helps you avoid lumps and keeps the surface even.
Use different needles for each stage. Begin with a 36-gauge needle for shaping, then switch to a 38-gauge for details. Finish with a 40 or 42-gauge needle for the smoothest surface.
Always stab straight up and down. This keeps the wool even and protects your needle.
For stubborn fuzz, use a fine needle to tuck in stray fibers. Small scissors or tweezers help trim any leftover fuzz.
If your piece feels dense, try an electric shaver or a cool iron on flat areas to smooth out the surface.
Some artists use a tiny bit of diluted glue to tame fuzz, but test it first on a scrap piece.
Tip: Keep working until almost no stray fibers remain. Use a fine sewing needle to tuck in the last bits, then trim with embroidery scissors. Your project should feel firm but not rock hard.
Pawimprint artists use these same steps to create pet portraits that look real and feel smooth. You can use these tricks at home to repair rough spots and get a professional look.
Preventing Needle Breakage
Broken needles can slow you down and cause frustration. You can avoid this kind of damage by using the right technique. Here’s how you can protect your tools and keep your project safe:
Always insert and pull out your needle at the same angle. This stops sideways pressure that can snap the needle.
Work with a gentle, steady hand. Don’t force the needle. Let the barbs do the work.
Only poke as deep as you need. If you go too deep, you risk bending or breaking the needle. Try putting a small piece of tape on your needle as a depth marker.
Use the right needle for the job. Coarse needles work best for shaping, while fine needles are for details.
Make sure your workspace is well-lit. Good lighting helps you see where you’re poking and prevents accidents.
If you hit something hard, like wire or a dense core, stop and check before you continue.
Note: If you break a needle, don’t worry. You can repair the spot by removing any broken pieces and felting the area again. Stay patient and keep practicing—your skills will grow.
Pawimprint’s artists always use careful, steady pokes and the right tools. Their attention to detail helps them avoid damage and create lasting keepsakes. You can follow their example to protect your needles and repair any small mistakes.
Firmness and Shape Tips
A firm, even shape is the secret to a lifelike felted figure. If your project feels too soft or looks uneven, you can repair it with a few simple steps:
Roll your wool tightly before you start felting. This squeezes out air and makes a strong base.
Use a BBQ skewer or stick as a guide. Wrap wool around it to keep your shape even, then remove it and keep felting.
Start with a coarse needle to build the shape. Switch to finer needles for details and smoothing.
Squeeze your project often. It should spring back and feel solid, not squishy.
Add wool in thin layers. Build up slowly instead of using too much at once.
Trim fuzz with sharp scissors for small spots or a beard trimmer for bigger areas.
Take your time. Patience leads to better results and helps you avoid uneven shapes.
If you notice a lumpy spot or a part that feels weak, you can repair it by adding a thin layer of wool and felting it in place. For bigger problems, gently pull off the wool and start again in that area. Needle felting lets you fix and repair damage as you go, so don’t be afraid to make changes.
Callout: Pawimprint’s artists check firmness and shape at every step. They use the squeeze test and listen for a crisp sound to make sure each piece is just right. You can use these habits to improve your own work and create keepsakes you’ll love.
Needle felting is forgiving. You can always repair mistakes, fix a felting problem, and recover from damage. With practice and the right techniques, your projects will look better every time.
Now you know what makes 3D needle felting look real. Fiber preparation and layering are very important. Pick the right wool and blend colors for smooth shapes. This helps your pet portraits look more lifelike. Many crafters say planning and mixing fibers helps a lot. Their projects look and feel more natural. Try these steps and see how your work changes. If you want ideas or need help, Pawimprint can support you. They have pretty examples and are always friendly. You can find guides, books, and online groups to help you learn. 🐾
FAQ
How do I choose the best wool for 3D needle felting?
You want wool that felts easily and holds shape. Try Corriedale or Romney for the core. Use Merino for smooth outer layers. Test small samples to see what works best for your project.
Why does my needle keep breaking?
You might poke at an angle or use too much force. Always stab straight up and down. Use the right needle for each step. If you hit something hard, stop and check before you continue.
Can I fix a lumpy or uneven sculpture?
Yes! Add thin layers of wool to the lumpy spots. Felt gently until the shape looks even. If needed, pull off wool and start again in that area. Patience helps you get a smooth finish.
How do I blend colors for realistic pet fur?
Tip: Layer small amounts of different colored wool. Felt in the direction the fur grows. Mix and blend as you go. This gives your sculpture a natural, lifelike look.
What should I do if my project feels too soft?
Squeeze your sculpture. If it feels squishy, add more core wool and felt it firmly. Keep building up thin layers until it feels solid and holds its shape.