
How to Shape and Detail Wool Felt Pet Portraits
You create handcrafted wool felt pet portraits by shaping wool with special needles. You add details to make the portrait look real, showcasing your pet’s unique features. Each project becomes a keepsake you can treasure. Many people opt for custom choices like keychains or photo frames, while some choose a memorial crystal from Pawimprint. These items help individuals remember their pets in a meaningful way. Customers appreciate the high-quality materials and custom options available, often describing these keepsakes as a comforting memorial. The market for handcrafted wool felt pet portraits continues to grow each year, reflecting the deep care people have for remembering their beloved pets.
Key Takeaways
Pick good wool like Merino for details. Use Corriedale wool for the main shape. This mix makes your pet portrait look better.
Use clear photos of your pet at eye level. Make sure the light is good and the photo is sharp. This helps show real colors and features.
Shape the base slowly and carefully. Take your time to make it look real. Patience helps you show what makes your pet special.
Add more wool in layers for fur texture. Mix colors and follow how the fur grows. This gives your portrait more depth.
Make your keepsake special with accessories or your pet’s name. These small things make each portrait unique and important.
Tools and Materials
Wool Selection
When you start needle felting, your choice of wool shapes the final look of your handmade wool pets. Many artists prefer Merino wool for its softness and ability to take dye well. This wool helps you create fine details in your pet portraits. Corriedale wool, which feels a bit coarser, gives your sculpture strength and depth. You can use Merino for the outer layers and Corriedale for the core.
For projects requiring fine detail, such as custom pet portraits, it is recommended to use soft, fine fibers like Merino wool. Coarser wools like Corriedale are better suited for the inner structure of 3D sculptures.
When sourcing roving, look for clean, undyed core wool. Responsible Wool Standard (RWS) certified wool ensures sustainability and quality. You want wool that is free from straw or dirt and has long, strong fibers. At Pawimprint, you can expect high-quality materials that meet these standards. I have tested different suppliers and always choose those who deliver clean, reliable wool for every handmade project.
Felting Needles
Needle felting relies on special barbed needles. These needles come in different sizes and shapes. Fine needles help you add details to your handmade wool pets, while thicker needles work best for shaping the base. You should keep a variety of needles on hand. This lets you switch between building structure and adding texture. Always handle felting needles with care, as they are sharp and can break if used incorrectly.
Reference Photos
Clear reference photos guide your needle felting process. Choose a high-quality photo that shows your pet’s whole face. Make sure the eyes and main features stand out. Take photos at your pet’s eye level using natural light. This helps you see true colors and avoid harsh shadows.
Select at least one clear photo that shows your pet's eyes and main features.
Avoid harsh lighting conditions.
Ensure the photo is sharp and free from blurriness.
Focus on details to capture your pet’s personality.
Take photos at your pet’s eye level.
If you need help with customization, Pawimprint’s customer service team can guide you in choosing the best reference photo for your handmade wool pets. This support ensures your needle felting project starts with the right materials and inspiration.
Shaping Wool Felt Pet Portraits
Creating the Base Form
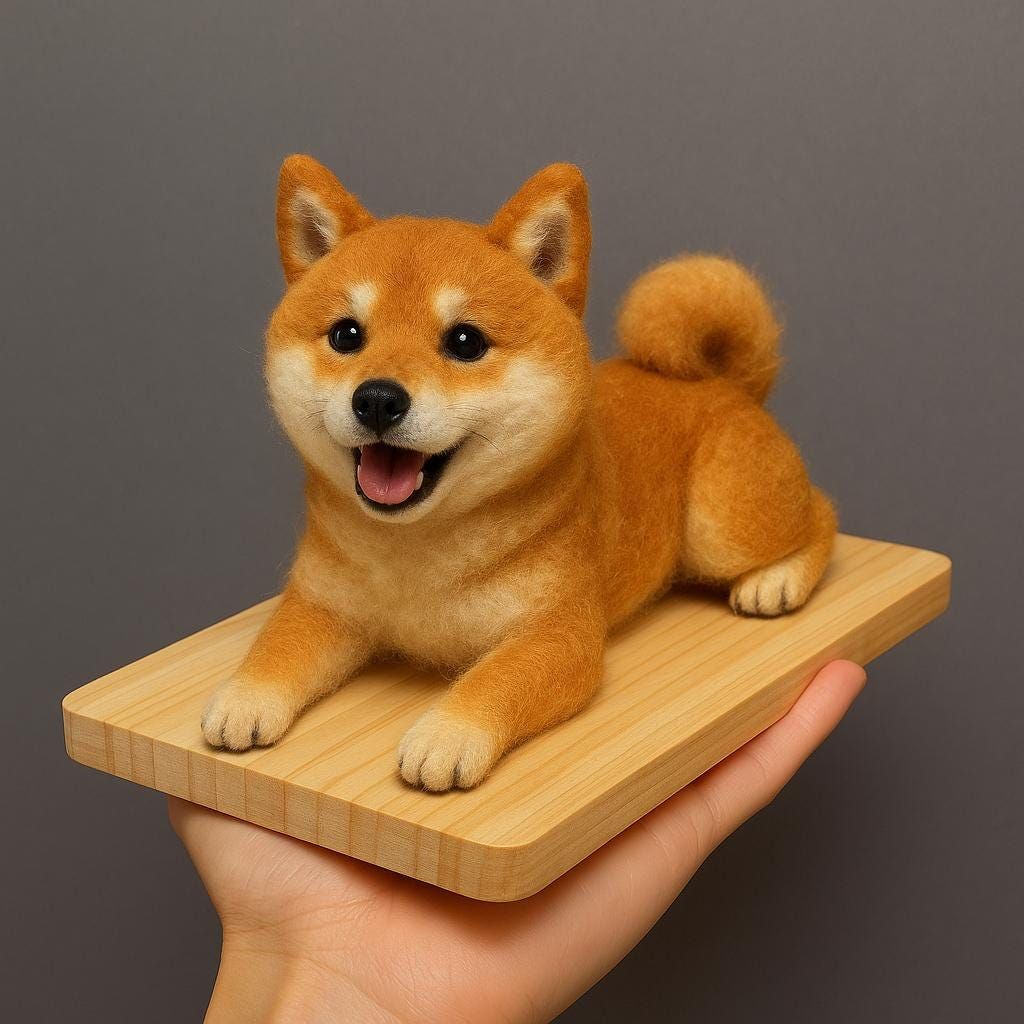
You begin the craft of wool felt pet portraits by shaping the base form. This step sets the foundation for a lifelike result. Needle felting requires patience and careful attention to detail. You start with core wool, rolling it into an oval or round shape that matches your pet’s head or body. Use your hands to mold the wool, then secure it by poking with a felting needle. This action binds the fibers together and creates a firm structure.
Tip: Always compare your work to a high-quality reference photo. This helps you capture your pet’s unique features.
Follow these steps to create the base form for wool felt pet portraits:
Preparation: Select your pet’s favorite pose or character. Lay out the wool to match your design.
Building the Base Shape: Roll core wool into the desired shape. Use your needle to poke and secure the wool, forming the head and body.
Layering Features: Add thin layers of wool to build up cheeks, chin, and forehead. Adjust the shape to match your pet’s features.
Attaching Ears: Roll small pieces of wool for the ears. Attach them to the head using your needle.
Refining Details: Use specialty needles and small tools to shape the eyes and nose. Focus on symmetry and proportion.
You need to invest time in this process. Creating realistic wool felt pet portraits often takes two weeks to a month. Smaller pieces finish faster, but full-body sculptures require more effort. You build the form slowly, adding layers and refining details. This approach prevents a dense, unnatural surface and helps you achieve lifelike results.
Beginners often face challenges in the craft of wool felt pet portraits. Choosing the right wool can be confusing. You need core wool for structure and fine wool for details. Many people want quick results, but patience is essential. Mistakes happen, especially with uneven features. Embrace imperfections and keep practicing. Each pet portrait improves your skills.
Building Structure for Keychains and Frames
When you create wool felt pet portraits for keychains or frames, you need to adjust your technique. Keychains require a sturdy base that can withstand daily use. Frames need a flat, stable form that fits inside the display.
For keychains, start with a strong wire armature. This wire supports the wool and allows you to shape dynamic poses. Wrap core wool around the wire, then use needle felting to secure the fibers. Add thin layers of fine wool for texture and color. Pay attention to the direction of fur growth. This detail makes your pet portrait look natural.
Note: Use fine needles for small features. This prevents damage and keeps details sharp.
For frames, build a flat base using core wool. Shape the wool to fit the frame size. Use your needle to flatten and secure the wool. Add layers of colored wool to match your pet’s fur. Blend different tones for realism. Attach the finished portrait to the frame with glue or thread.
Common challenges include choosing the right wool and achieving realistic proportions. You need to compare your work to the reference photo often. Practice with smaller projects first. This builds confidence and helps you master needle felting techniques.
You create wool felt pet portraits by following a careful process. You shape the base, build structure, and refine details. Needle felting takes time, but the results are worth the effort. Each pet portrait becomes a unique keepsake that honors your pet’s memory.
Detailing Wool Pet Portraits
Fur Texture
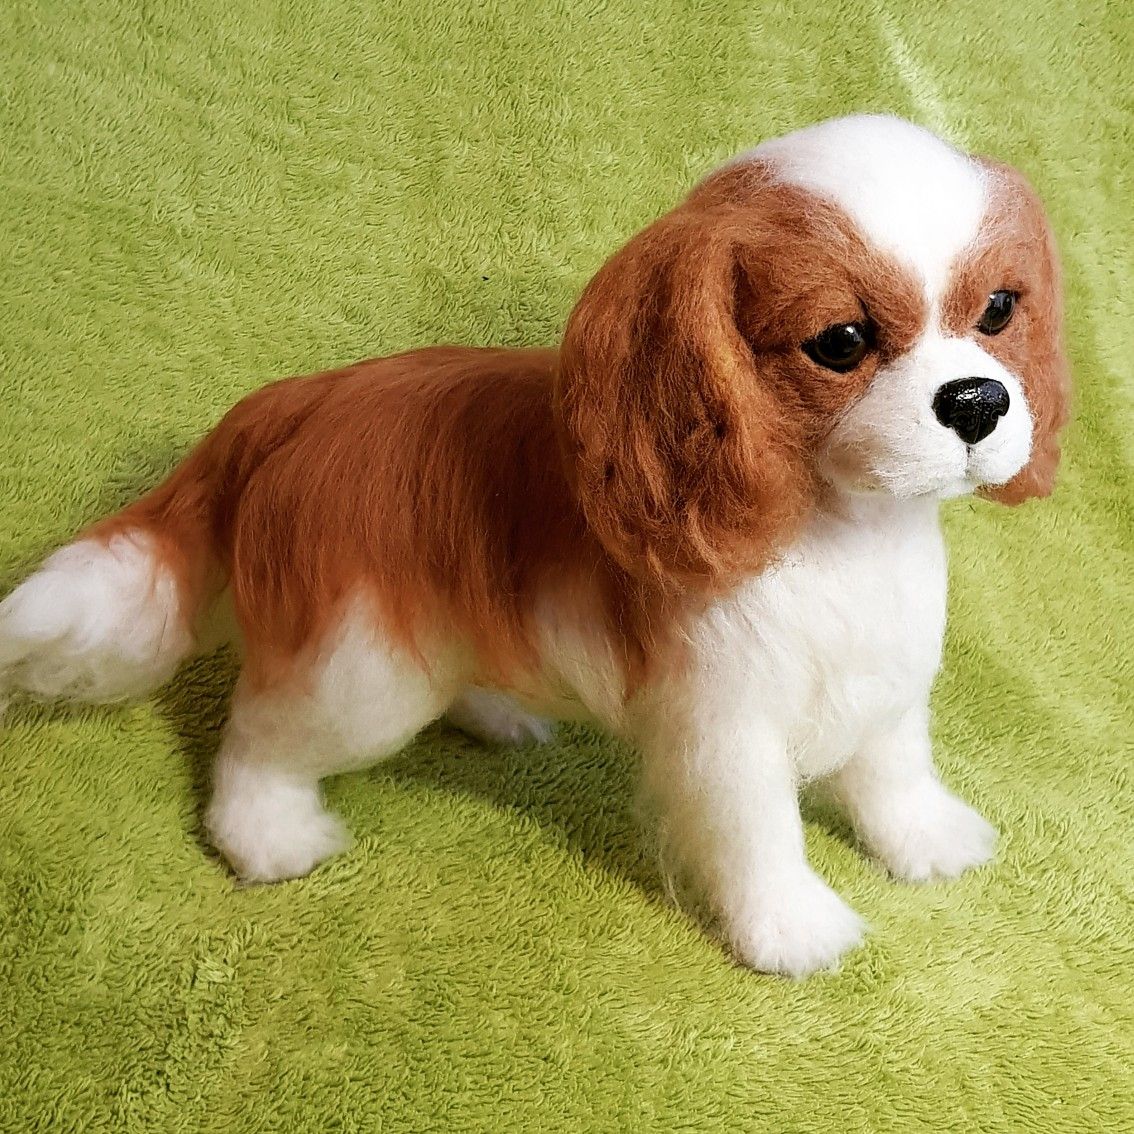
You make wool pet portraits look real by working on fur texture. Layering and mixing wool helps you get a lifelike look. Experts say to use thin strips of wool and follow the way your pet’s fur grows. You use a felting needle to poke the wool into place. This shapes the surface and makes it look 3D. This method adds depth and movement to your portrait.
Mixing wool colors helps you match your pet’s markings.
Using light and dark colors makes the fur look deep.
Artists use real pet photos to copy fur patterns and colors.
You get small bits of colored wool for markings. Put them where you need and poke them in with the needle. Trim the fur with small scissors or thinning shears to blend the edges. This keeps the lines soft and natural. If you rush or use the wrong wool, mistakes can happen. Use core wool inside and softer wool on the outside. Turn your project often to keep the fur even.
Facial Features
You show your pet’s personality by making the face look right. Start with the eyes, since they show emotion. Roll tiny balls of black wool for each eye. Put them on the head and poke them gently to keep them even. Felt around the eyes to make them stand out. Add thin strips of cream or gray wool for eyelids. Use a little brown wool in the corners for a natural look. Put a small black wool ball on top for the pupil. Add a tiny white dot to show light.
"The portrait is absolutely incredible; they perfectly captured every detail from his eyes to his fur, it's spot on."
You fix the wool around the eyes and nose to keep things balanced. Make sure both eyes are the same size and shape. This stops the face from looking odd. You can use glass eyes to make them sparkle and look real. Adding whiskers makes the portrait look more natural. Always check your pet’s photo to match the features.
For the nose and mouth, put thin strips of wool over the base. Use your needle to poke and shape the nose and mouth. Get colored wool for markings and poke them in place. Trim and blend the edges for a smooth look. Stack small bits of different colored wool, pull them apart to mix, and layer them on the felt. Mix colors for shadows or highlights.
Accessories
You make wool pet portraits special by adding accessories. These details make each portrait one of a kind. You can pick different poses and add clothes or accessories. You can put your pet’s name on the portrait or frame. Some artists use real fur for extra meaning. You can choose the size, from keychains to big wall art. You can match the background to your home or hobbies.
Customization Aspect |
Details |
|---|---|
Pose & Outfit |
Pick poses and add clothes or accessories |
Name Addition |
Put the pet’s name on the portrait or frame |
Real Fur Option |
Use real fur for extra meaning |
Size Choices |
Pick keychains, small frames, or big wall art |
Themes |
Match backgrounds to hobbies or pop culture |
Add your pet’s name or a special date to make it personal.
Use real fur to feel closer to your pet.
Match the background to your favorite things or home style.
You avoid mistakes by starting with easy shapes and simple projects. Use different needle sizes for shaping and details. Protect your fingers and use a good felting mat. Take your time and turn your project to keep it even. You get better with practice and by paying attention to details.
You make wool pet portraits that help you remember your pet. Needle felting lets you shape fur, faces, and accessories with care. Each portrait becomes a special keepsake that shows your pet’s spirit and personality.
Custom Needle-Felted Pet Finishing
Final Shaping
You finish your wool pet portraits by shaping them carefully. Experts say to layer wool and overlap edges. This stops lumps from forming. Rub the surface with your fingers to move fibers. This helps close small gaps. Use a soft brush, like a baby brush, to blend fibers. This makes the surface smooth. Trim stray fibers with small scissors for a neat look. For flat spots, use a mini iron or hair straightener. Press down fuzz to make it look clean.
Quality checks are important for every wool pet keepsake. You use wool that is sourced in a kind way. This makes the portrait strong and nice-looking. Start with clear, bright photos of your pet. Good photos help you show every detail. The table below explains how these steps help quality:
Quality Step |
Description |
|---|---|
Makes the portrait last and look new. |
|
Clear and Bright Photos |
Helps you get lifelike and accurate features. |
Check your work often and compare it to your pet’s photo. This helps you match your pet’s look and personality. You make keepsakes that families will love for years.
Attaching Keychains or Framing
You finish your keepsakes by adding keychains or putting portraits in frames. Professionals use acid-free and lignin-free boards to protect artwork. Do not let glue touch the felt. This keeps the fibers safe. Use special tapes and spacers to protect your keepsake from changes in the air. Thin felt pieces need heavier fabric on the back for support. Sew layers together before stitching to keep the shape. Wooden frames or shadow boxes make your wool pet portraits look even better.
Customers feel happy and amazed when they get their keepsakes. Many say the portraits show their pet’s look and spirit. Families treat these keepsakes as special treasures. Keychains are called cute and well-made, and they arrive quickly. Extra treats or magnets make the gift special. Keychains remind you of your pet every day. They show the love and care in each item.
If you want something special, Pawimprint’s Personalized 3D Pet Photo Heart Shaped Crystal is a good choice. This keepsake uses 3D laser engraving and clear optical glass. You also get free custom socks with your order. The design helps you keep memories in a beautiful way.
Feature |
Description |
|---|---|
3D Laser Engraving Technology |
Makes your pet’s photo look three-dimensional. |
High-Quality Optical Glass |
Keeps your keepsake strong and clear. |
Free Custom Socks |
Gives extra value to your pet order. |
Unique Design |
Makes a special tribute for your pet. |
You make keepsakes that honor your pet and comfort your family. Each wool pet portrait and crystal helps you remember the love you share.
You make wool felt pet portraits by adding layers of wool. You blend colors and shape the features to look real. Experts say to use good materials and follow their advice. This helps you get lifelike results. Many pet owners feel happy and comforted when they see these portraits. The details show their pet’s personality.
Handmade portraits help people feel close and happy.
Artists show what makes each pet special in every keepsake.
Factor |
Wool Felt Portraits |
Traditional Memorials |
|---|---|---|
Personalization |
Each one is unique |
Uses photos |
Durability |
Needs gentle handling |
Very strong |
Emotional Impact |
Feels comforting to touch |
Lasts a long time |
You can make your own portrait project. Or you can look at Pawimprint’s custom keepsakes to remember your pet.
FAQ
How long does it take to make a wool felt pet portrait?
You usually need one to four weeks to complete a wool felt pet portrait. The time depends on the size, detail, and your experience level. Small keychains finish faster than full-body sculptures.
What is the best way to care for my wool felt pet keepsake?
You should keep your wool felt keepsake away from water and direct sunlight. Use a soft brush to remove dust. Store it in a cool, dry place. Handle it gently to keep the fibers looking neat.
Can I request custom features or accessories for my portrait?
You can request custom features, colors, or accessories for your portrait. Pawimprint’s team works with you to match your pet’s unique markings, favorite poses, or special items. Contact customer service for help with your ideas.
What materials do you use for Pawimprint’s personalized products?
You receive products made from high-quality wool, optical glass, and safe, durable materials. Pawimprint selects each material for its strength and clarity. The team ensures every keepsake meets strict quality standards.
How do I choose the best photo for my custom portrait?
You should pick a clear, bright photo that shows your pet’s face and eyes. Natural light works best. Avoid blurry or dark images. A good photo helps the artist capture your pet’s true personality.