
How to Make a Custom Pet Wool Felt Portrait at Home
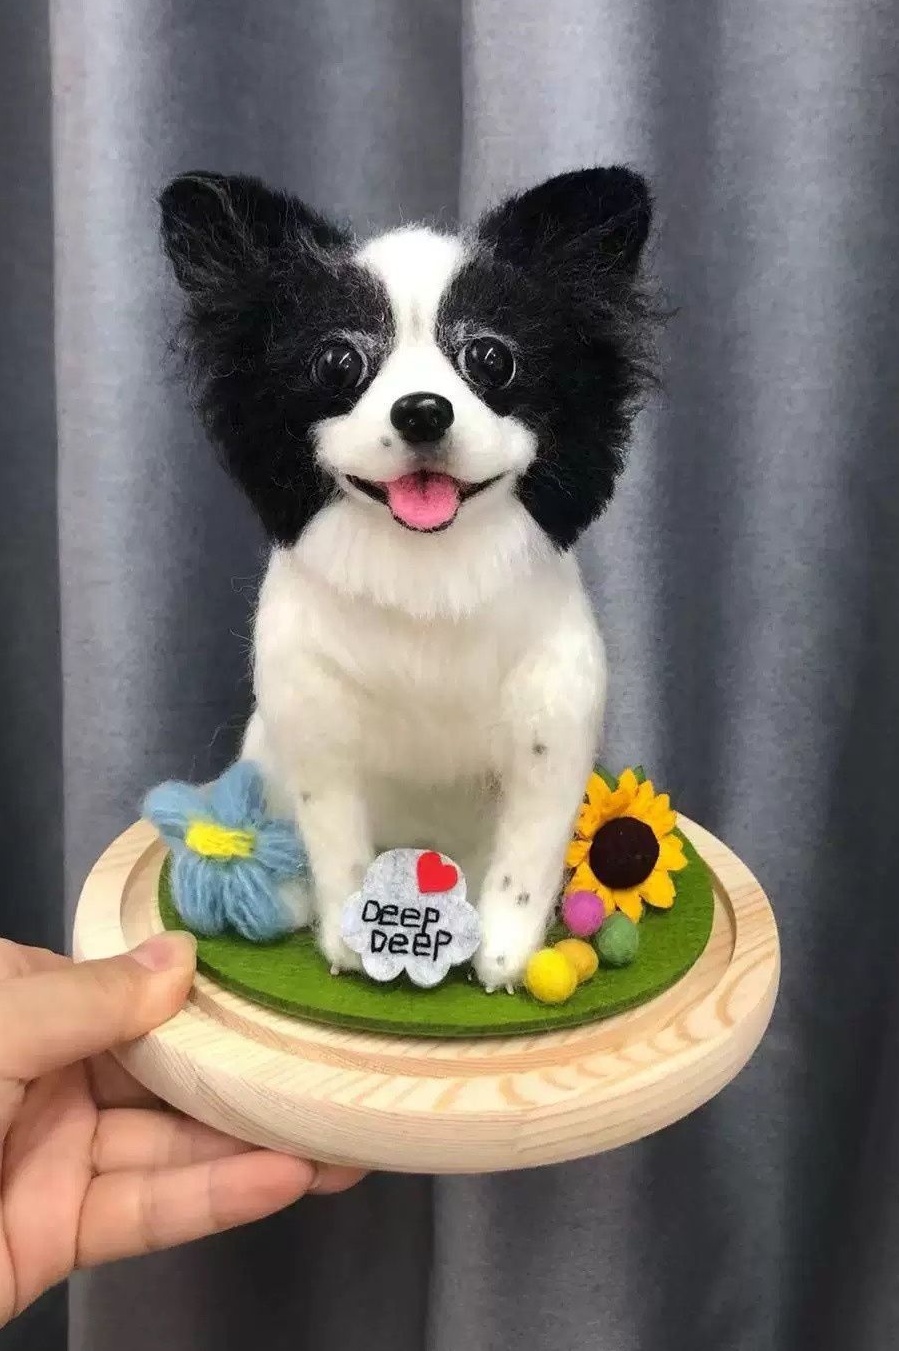
Anyone can make a pet wool felt portrait at home. You do not need any experience. Handmade wool felt portraits are a special way to show your pet’s personality. They help bring your pet’s spirit into your home. Many pet owners love these portraits as gifts or keepsakes. Some people add names or dates to make them more special. Making a needle felted pet portrait is fun and feels good. It is easy when you have simple instructions. Pawimprint’s lifelike pet wool felt creations inspire pet lovers. They help you show the special things that make your pet unique.
Key Takeaways
Collect good wool and the correct felting tools to make pet portraits that look real and detailed.
Pick a clear photo of your pet with good lighting to show their special features well.
Make the portrait step-by-step. Shape the base first. Felt the eyes and nose with care. Add fur and markings by layering wool.
Stay safe by using a felting mat. Keep your fingers away from sharp needles. Take breaks so you do not get hurt.
Make your portrait unique with different poses or accessories. You can also use real pet fur. This makes a special keepsake or a nice gift.
Materials for Pet Wool Felt

Creating a pet wool felt portrait starts with gathering the right supplies. The right materials make a big difference in how the finished portrait looks and feels. Pawimprint’s artists use pure wool and pay close attention to detail, which inspires many pet lovers to try making their own keepsakes at home.
Wool Types and Colors
Choosing the right wool is important for a realistic pet wool felt portrait. Different types of wool work best for different parts of the project. Here’s a quick guide:
Wool Type |
Best Use |
Why It Works Well |
|---|---|---|
Building the firm inner shape |
Affordable, strong, not visible in the final piece |
|
Carded Batts & Slivers |
Sculpting, layering, blending colors |
Easy to blend, great for texture and color effects |
Merino Tops/Roving |
Outer coat, straight fur |
Soft, fine fibers for lifelike fur |
Small details, color blending |
Blends easily, perfect for fine details |
|
Multiple Tones/Colors |
Realistic fur patterns |
Mimics natural color variations in pet coats |
Artists often use several shades to match the unique markings of each pet. Using high-quality wool, like merino, helps create a soft and lifelike finish.
Felting Needles and Tools
Felting needles come in different sizes and shapes. For pet wool felt portraits, sizes 36, 38, and 40 triangle needles, plus a 38 star needle, work well for details like eyes and noses. Using a variety of felting needles helps create fine details and smooth fur. Needle holders, finger protectors, and small scissors are also helpful needle felting supplies.
"High-quality wool and the right tools let artists blend colors and control fibers for amazing detail in pet portraits."
Having backup needles is smart, since they can break during felting. Using soft wool for the final layer gives the portrait a smooth look.
Fabric Base and Mats
A strong felt base, usually made from 2mm non-woven fabric, supports the wool artwork. This base keeps the portrait sturdy. Many artists mount the finished wool felt portrait in a wooden frame for display. Felting mats or foam pads protect hands and surfaces during needle felting.
Workspace Safety
Felting needles are sharp. Always keep fingers away from the needle’s path. Use finger guards and work on a felting mat. Good ventilation helps avoid breathing in wool dust. Take breaks to stretch and rest hands. Keep band-aids nearby for small pokes. Never leave felting needles out where pets or kids can reach them.
Preparing Your Needle Felted Pet Portrait
Choosing a Reference Photo
A great needle felted pet portrait starts with the right photo. The best portraits come from clear, focused images. When picking a photo, pet owners should look for these things:
Choose a high-quality photo that shows the pet’s whole face.
Make sure the eyes and main features are easy to see.
Use a photo taken at the pet’s eye level, not from above or below.
Natural light works best. Shaded outdoor light helps show true colors and avoids harsh shadows.
Avoid blurry photos or ones with strong sunlight or dark indoor lighting.
If using a professional photo, check that you have permission to use it.
Having a few extra photos can help capture the pet’s personality and markings. These details make the needle felted pet portrait more lifelike.
Transferring the Image
Once the photo is ready, it’s time to get the image onto the felt base. There are several ways to do this. Some artists trace the pet’s outline with a fabric pen. Others use a stencil made from pattern paper for more precise shapes. Freezer paper can also help. Print or draw the pet’s image on freezer paper, cut it out, and iron it onto the felt. This holds the pattern in place while you work. For colorful or detailed portraits, iron-on transfer paper works well. It lets you print the pet’s image and transfer it directly onto the felt base.
Tip: Digital tools like a tablet or printer can make tracing and transferring much easier, especially for beginners.
Outlining Key Features
Outlining the pet’s main features is a key step in making a lifelike portrait. Start with the eyes. Capture their shape, color, and any highlights. Next, outline the nose, adding nostrils and shading for depth. Mark the fur around the eyes and nose, then add any special markings like stripes or spots. Don’t forget the ears and jawline. Use small amounts of wool for fine details. Mixing colors helps create shadows and highlights. Taking time with this step helps the needle felt portrait look real and full of character.
Step-by-Step Instructions
Building the Base Shape
Start by shaping the base of the pet’s head and body with core wool. Use your hands to roll the wool into a rough oval or round shape, depending on your pet’s face. Secure the wool by poking it with a felting needle. Short, quick stabs work best. This helps the wool fibers lock together and form a firm base. Add more wool in thin layers to build up the cheeks, chin, and forehead. Check the shape from all sides. Adjust as needed to match your pet’s features. For the ears, roll small pieces of felt and attach them to the head with the needle. Make sure the ears sit at the right angle. Use a felting mat or cushion under your work to protect your hands and the table.
Tip: Always keep your fingers away from the needle’s path. Felting needles are very sharp and can cause injury if not used carefully.
Felting Eyes and Nose
Creating realistic eyes and a lifelike nose brings the portrait to life. Follow these steps for best results:
Roll small balls of black wool in your hands to form the base of each eye.
Place the wool balls on the head. Lightly felt them in place, checking from above and the front to make sure both eyes are even and symmetrical.
Felt around the edges of each eye shape. Keep the center rounded to create a 3D effect.
Add thin strips of cream or grey wool to form eyelids. This frames the eyes and makes them look more real.
Use a tiny bit of brown wool in the inner corners of the eyes to mimic natural details.
Layer a small black wool ball on top of the iris for the pupil. Position it to control where the eyes look.
Add a tiny white dot to each eye to show light reflection. This makes the eyes look shiny and alive.
Adjust the wool around the eyes and nose to fit the face shape. Narrow the bridge of the nose or pull in the eye corners for better harmony.
Keep checking that both eyes match in size, shape, and detail. This avoids odd or unnatural expressions.
For the nose, shape a small oval or triangle with brown or black wool. Attach it to the face with the needle. Felt around the edges to blend it into the face. Add nostrils and shading with darker wool for depth. Adjust the nose’s position and size to match your pet’s photo.
Note: Take your time with the eyes and nose. These features give the portrait its personality.
Adding Fur and Markings
To add fur, layer thin strips of wool over the base shape. Use a felting needle to poke the fibers into the felt, following the direction of the fur in your pet’s photo. For markings, prepare small amounts of colored wool or even brushed-out yarn. Place these fibers where you see spots, stripes, or patches on your pet. Use the needle to secure them, stabbing many times in a small area. This keeps the markings in place and makes them look natural. After felting, trim the fur with small scissors or thinning shears to blend the edges. This step helps avoid harsh lines and creates a soft, lifelike look.
Tip: Mark the felt with a transfer pen or chalk before adding markings. This helps keep patterns accurate.
Blending Colors
Blending colors makes the portrait look real. Stack small amounts of different colored wool together. Hold one end and gently pull the fibers apart with your fingers. This mixes the colors while keeping the fibers straight. Layer the blended wool onto the felt, following the natural fur direction. Use a felting needle to secure the fibers. For shadows or highlights, mix complementary colors. For example, add a touch of pink to olive-green for a natural skin tone, or blend magenta with green for a softer shade. Layering and blending in this way creates depth and realistic fur tones.
Hand blending gives you more control than using brushes. It works especially well for long fur and helps each strand stand out.
Troubleshooting Tips
Needle felting takes patience and practice. Here are some common problems and how to fix them:
Always use a felting cushion. This protects your hands and keeps the project safe.
Use short, quick stabs with the needle. Deep stabbing does not felt faster and can damage the needle.
Choose the right needle size. Start with a Star 36 needle and switch to finer needles for details.
Pick wool that felts well, like Romney or Icelandic. Avoid Superwash wool, which does not felt easily.
Keep the needle straight. Sideways pressure or prying can break the needle.
If the surface looks rough, use thin wool layers and a fine needle to smooth it out.
Broken needles often happen from stabbing at an angle or using too much force. Work gently and always on a mat.
Uneven shapes can be fixed by adding wool to thin spots and felting gently.
Good lighting helps you spot mistakes early. Check your work often.
Smoothing the final layer makes the portrait soft and lifelike.
Stay focused while felting. Never look away when using the needle. Pay attention to your hands and the needle’s position to avoid injury.
Pawimprint’s artists pay close attention to every detail, especially the eyes and nose, to create lifelike results. With these instructions and needle felting techniques, anyone can make a beautiful needle felt portrait of their pet at home.
Finishing Needle Felted Portrait
Cleaning and Shaping
After completing the felt portrait, artists inspect the piece for loose fibers or rough edges. Small scissors work well for trimming stray fibers, but they should avoid cutting too close to the surface. Some artists use a fabric shaver for a smooth finish. For flat pieces, a light mist of water and gentle ironing can help flatten and compact the fibers. If the portrait needs reshaping, blocking works best. Place the felt on a clean towel or foam pad, gently shape it, and let it air dry. These steps help the finished needle felted portrait look neat and professional. Adding the final details, like tiny whiskers or a touch of color, brings the pet’s personality to life.
Tip: Always handle the felt gently during cleaning and shaping to keep the structure intact.
Mounting and Framing
Mounting and framing protect the portrait and make it easy to display. Acid-free and lignin-free backing boards prevent damage over time. Artists avoid adhesives that touch the felt directly, since some glues can harm the fibers. Archival-safe tapes and inert spacers keep the artwork safe from environmental changes. For extra support, thin felt pieces can be backed with heavier fabric. Basting the layers together before stitching helps the portrait keep its shape. Many people choose wooden frames or shadow boxes to highlight the portrait’s details. Pawimprint offers custom display options, like elegant frames and glass domes, which inspire pet lovers to create beautiful displays at home.
Care and Display
To keep the portrait looking its best, display it in a dry, protected spot. Avoid direct sunlight, which can fade colors. Humidity can damage the felt, so keep it away from damp areas. Dust the portrait gently with a soft brush or by blowing off dust. Handle the artwork as little as possible to preserve its surface. Never comb or pull on long fibers; use a blunt needle to adjust them if needed. Protect the portrait from insects by placing lavender sachets or cedar blocks nearby. Replace these repellents each year for continued protection. These simple steps help the portrait stay beautiful for years.
Displaying the portrait in a special place at home or giving it as a heartfelt gift makes the effort worthwhile.
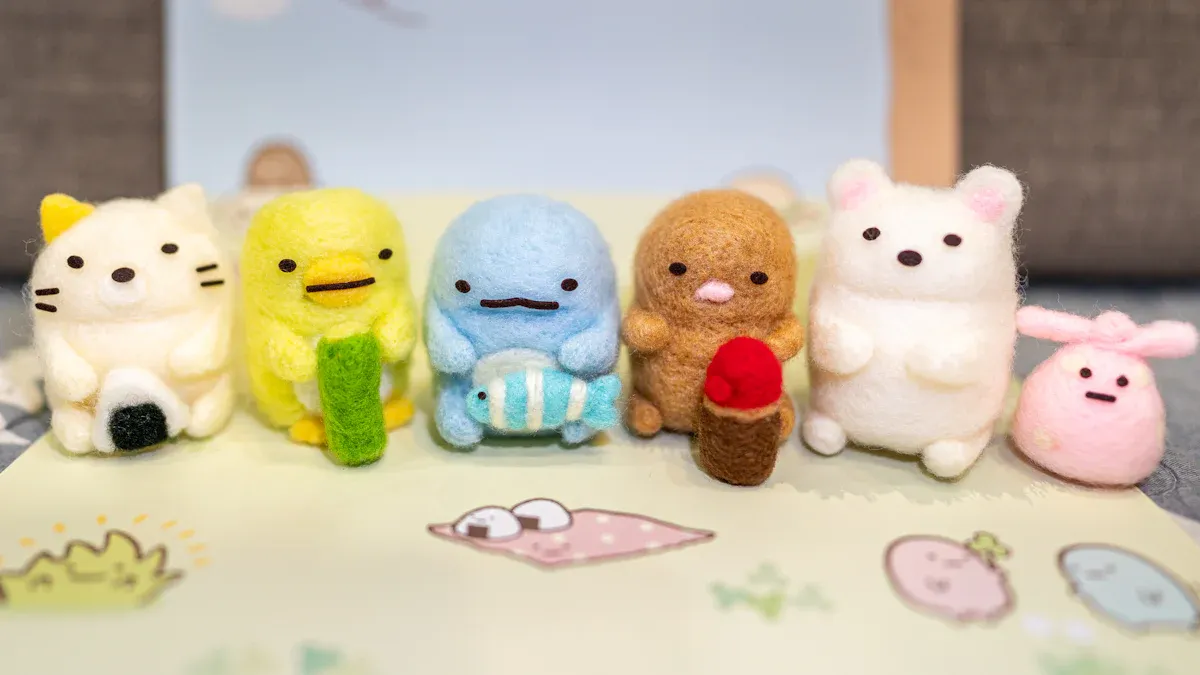
Needle Felted Cat Designs & Creative Ideas
Customization Tips
Needle felted cat designs let you show your pet’s style. You can pick a pose you like or add a favorite toy. Some people dress their cat in a small sweater or put on a collar with a name tag. Others match the background to their home or use a fun theme from movies or TV. Artists often ask for many photos from different sides to see all the details. Adding your pet’s name or a special date makes the portrait more personal.
Here’s a quick look at popular customization options:
Customization Aspect |
Details |
|---|---|
Pose & Outfit |
Pick sitting, standing, or playful poses; add clothes or accessories |
Name Addition |
Put the pet’s name on the portrait or frame |
Real Fur Option |
Mix real fur into the felting for extra meaning |
Size Choices |
Choose keychains, small frames, or big wall art |
Themes |
Pick backgrounds or styles that match hobbies or pop culture |
These choices help make each needle felted cat design special.
Using Real Pet Fur
Some artists use real pet fur in their work. Mixing real fur with wool puts a part of your pet in the portrait. This makes the keepsake even more special. Pet owners can save fur when brushing and send it to the artist. The fur mixes with the wool and looks soft and natural. Many people say this step helps them feel close to their pet, especially for a memorial. Pawimprint lets you use real fur for custom orders, so each portrait is unique.
Tip: Always wash and dry the fur before sending it for felting. This keeps the portrait clean and safe.
Gift and Memorial Ideas
Needle felted cat designs are great gifts for any event. People give them for birthdays, holidays, or to remember a pet. Some like 3D sculptures, while others want framed portraits. These gifts bring joy and comfort to families. Many people say the portraits show their pet’s spirit and personality. Some even cry when they see the finished piece. The soft feel and lifelike look make these gifts special keepsakes.
Popular ideas include:
Memorial sculptures for pet loss
Framed portraits for display
Keychains or ornaments with a cat’s likeness
Personalized gifts for Mother’s Day or Father’s Day
Pawimprint has many custom options, from real-looking 3D designs to fun styles. Each piece helps keep a pet’s memory close and alive.
Each pet wool felt portrait has its own story. Beginners might see small holes or have trouble picking wool. Every project helps you learn something new. With practice, you get better at making portraits. No two portraits ever look exactly the same. Showing your finished art to friends or family feels good. Sharing online can give you new ideas and make you feel proud. Many people put their portraits together on shelves. Some make special spots at home to show them off.
Pawimprint gives pet lovers lifelike, custom portraits and friendly help. They pay close attention to details and care about customers. This makes them a great choice for anyone wanting a special keepsake.
FAQ
How long does it take to make a pet wool felt portrait at home?
Most people finish a small portrait in 6–10 hours. Larger or more detailed pieces may take longer. Beginners might need extra time to practice. Working in short sessions helps keep the project fun.
Can kids try needle felting with adult help?
Yes! Kids can join in with close adult supervision. Adults should handle sharp needles. Kids can help pick colors, arrange wool, or add finishing touches. Needle felting makes a great family craft.
What if the portrait does not look like my pet?
Don’t worry! Every portrait looks unique. Try adjusting the eyes, nose, or markings. Use extra photos for reference. Practice helps improve results. Many artists learn new tricks with each project.
How do I keep my finished portrait looking nice?
Keep the portrait away from sunlight and moisture. Dust it gently with a soft brush. Store it in a safe spot, out of reach from pets or small children. A display case or frame adds extra protection.