
How to Create a Wool-Painted Portrait with Needle Felting

You can create a wool-painted portrait with needle felting by following easy-to-follow instructions and a step-by-step process. Wool painting gives your portraits a soft and dreamy look that feels unique and inviting. Many beginners love this craft because you only need wool felt, a needle, and a bit of patience. You start with the base, then layer colors and shapes until your portrait comes to life. Don’t worry if you make mistakes—beginners learn as they go. With practice, you will see your wool-painted portrait improve every time.
Tip: Beginners often enjoy seeing their skills grow with each wool-painted portrait they finish!
Key Takeaways
Begin your wool-painted portrait with basic tools. You need wool roving, felting needles, a base fabric, and patience.
Pick a clear photo with good lighting as your reference. This will help you put colors and shadows in the right spots.
Make your portrait in layers. Start with big shapes and light colors. Then slowly add details and shading.
Try different needle types and poke gently to mix colors well. This helps you make the face look real.
Stay safe by keeping your fingers away from the needles. Use finger guards and take breaks so you do not get tired.
Wool-Painted Portrait Basics
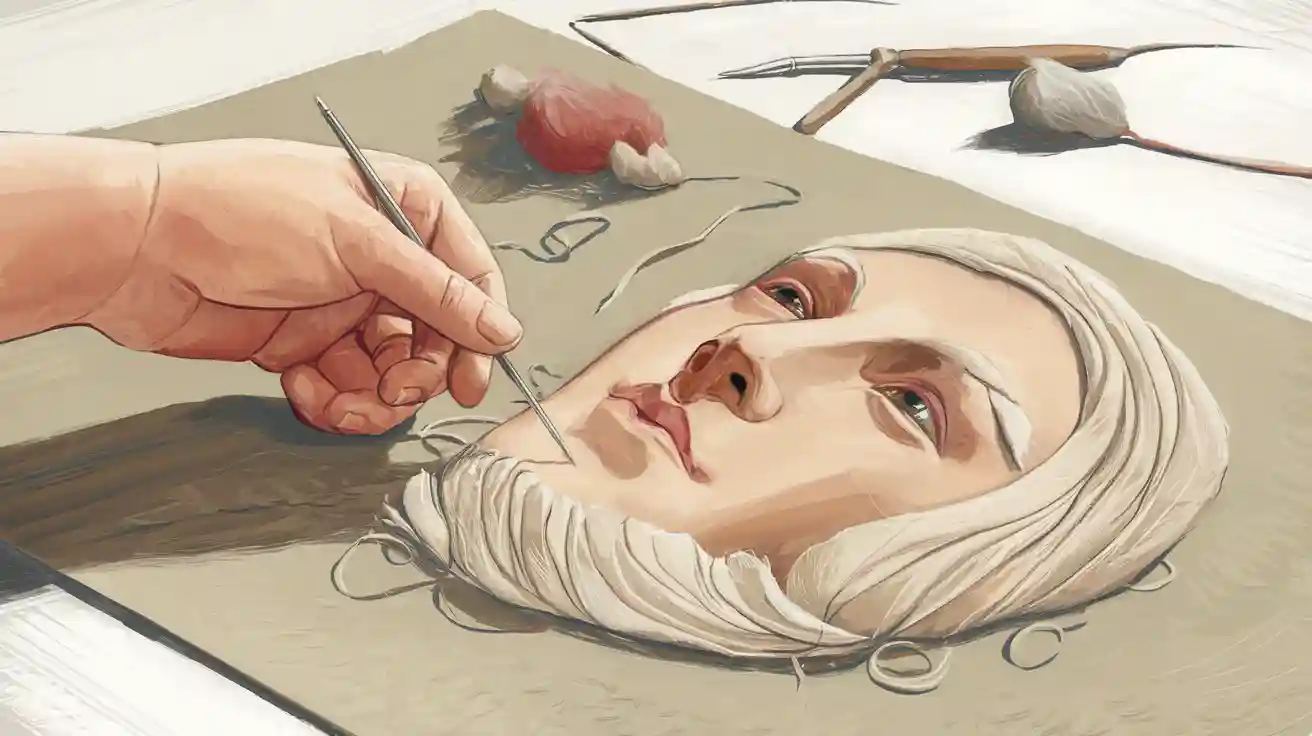
What Is a Wool-Painted Portrait?
A wool-painted portrait is a special kind of needle felt painting. You use wool fibres like paint, layering them on a flat surface to create a picture. This technique lets you blend colors and build up details, much like traditional painting. You start by transferring your design onto a base fabric, then use felting needles to poke the wool into place. The process feels slow and careful, but it gives you a soft, dreamy look that stands out from other fiber art. Artists often use black, white, and grey wool first to set the values, then add colors for depth and realism. This method helps you create portraits that look detailed and lifelike.
Materials and Tools
Before you begin, you might wonder what you will need for a wool-painted portrait. Here’s a handy list to get you started:
Wool roving in different colors for your image.
Felting needles—fine or medium gauge work best for portraits.
A felting mat or foam block to protect your work surface.
Wool felt or pre-felt fabric as your canvas.
An embroidery hoop to keep your fabric tight.
Marking tools like gel pens for outlining.
Good lighting, such as an LED lamp.
Tip: If you ever ask yourself, "What felting needles do I need?" Start with a size 38 star needle for most work, and try triangle needles for fine details.
You will also need patience and a willingness to experiment. Beginners often find that trying different wool types and tools helps them learn faster.
Choosing a Base Fabric
Picking the right base fabric makes a big difference in your wool-painted portrait. Wool felt is a favorite because it holds wool fibres tightly, keeps lines crisp, and does not pucker. Linen works well for detailed portraits, but it can pucker if you use too much wool. Some artists use cloth paper towels because they are easy to draw on and keep wool fibres in place, even when you hang your portrait. The weave and thickness of your fabric affect how the wool sticks and how long your portrait lasts. A good base fabric keeps your wool painting looking sharp and helps your wool fibres stay put for years.
How to Paint with Wool
Preparing Your Reference Image
Choosing the right photo makes a big difference in your wool portrait. You want a picture that shows clear details and strong shapes. Here’s a quick tutorial on how to pick the best reference:
Pick a large, high-quality photo so you can see every detail.
Look for lighting that comes from one side. This helps create shadows and gives your portrait form.
Make sure the chin, eyes, and other features stand out and are easy to see.
Avoid photos taken from odd angles. Straight-on or slightly turned faces work best.
Choose a photo that shows the person’s real character and expression.
Check for good contrast between light and dark areas. This helps your painting with wool look lively, not flat.
Feel free to adjust the photo as you work. Sometimes you need to fix bright spots or change shapes a little.
Remember, you will get better at reading photos and making changes as you practice.
Tip: A good reference photo helps you see where to place colors and shadows in your wool-painted portrait.
Transferring the Outline
You need to get your outline onto the base fabric before you start painting with wool. One easy way is to tape your photo and fabric to a window on a sunny day. The light shines through, making it simple to trace the main lines with a disappearing ink pen. This method works well for beginners and does not need fancy tools. You can also use a light table if you have one, but a window works just as well. Make sure your lines are clear but not too dark, so they do not show through the wool.
Setting Up Your Workspace
A safe and comfy workspace helps you enjoy needle felting. Here are some tips:
Use a needle holder to protect your fingers and make gripping easier.
Wear leather finger guards if you worry about pokes.
Keep your table clean and use a foam mat or wool pad under your project.
Store broken needles in a special container.
Keep a first aid kit nearby, just in case.
Work in a bright, airy room. Good air flow helps if you are sensitive to wool fibers.
Sit up straight and take breaks to stretch your hands and back.
Organize your wool and tools in boxes or bags so you can find everything fast.
Note: Always keep your free hand away from the needle. This keeps your fingers safe while you work.
How to Needle Felt a Picture
Building Up Layers
When you start to needle felt a picture, you want to build up your portrait in layers. This step gives your wool painting depth and helps you control the shapes. Here’s how to needle felt from the ground up:
Prepare your base layer. Place your woven fabric, like muslin, on a foam or wool mat.
Begin with the largest shapes first. Use light-colored wool fibres to block in the background and main areas of the face.
Insert your felting needle straight up and down. This keeps your needle from breaking and helps the wool fibres stick to the fabric.
Check your framing by placing an embroidery hoop over your work every so often. This helps you see if your portrait fits well.
Add small details as you go. You can use the hoop for this, but many people find it easier to work without it at first.
Keep layering thin wisps of wool. Each layer should be light and airy. This technique lets you blend colors and shapes smoothly.
Continue to needle felt until you feel happy with the look. When you finish, you can frame your wool painting for display.
Tip: Always start with the facial features and work from the top of the portrait down. This keeps your work neat and helps you avoid smudging finished areas.
Creating Facial Features
Facial features make your needle felted pictures come alive. You want to pay close attention to the shapes and shadows in your reference photo. Here’s a table to help you understand some classic techniques for building realistic faces in needle felt art:
Technique Category |
How to Use It in Needle Felt Art |
|---|---|
Anatomical Foundation |
Study the basic shapes of the skull and face. This helps you place eyes, nose, and mouth in the right spots. |
Classical Proportional Systems |
Use simple rules, like dividing the face into thirds or using the five-eye rule, to keep features balanced. |
Advanced Observational Skills |
Compare distances and shapes. Look at the spaces between features and notice how light and shadow change the face. |
Lighting Design |
Choose a lighting style, like Rembrandt or split lighting, to add drama and depth to your portrait. |
Skin Rendering Techniques |
Layer warm and cool wool colors to create lifelike skin. Use thin wisps for highlights and shadows. |
Feature-Specific Rendering |
For eyes, add a tiny bit of white for the highlight. For noses, use darker wool under the nostrils. For lips, blend pinks and reds. For hair, use long, thin fibres and layer them for texture. |
You can use different needle felting techniques for each part of the face. Try a triangle needle for smoothing cheeks and a spiral needle for sharp lines around the eyes. If you wonder what felting needles do I need, start with a medium needle for most work and switch to a fine needle for details.
Blending Colors and Shading
Blending colors is one of the most important parts of painting with wool. You want your needle felt art to look soft and realistic, not patchy. Here’s how to blend wool colors and create smooth shading:
Use thin wisps of colored wool. Layer them gently over each other to build up shadows and highlights.
Pick colors that match the skin tones and shadows in your reference photo. You can mix two or three shades together for a natural look.
Attach the wool with light pokes from your felting needle. This helps the fibres mix without harsh lines.
Work slowly. Add a little wool at a time and step back to check your progress.
For crisp edges, use finer wool and a higher gauge needle. This lets you control the shape and keep details sharp.
Dani Ives, a well-known fiber artist, says that you should treat needle felting like painting. Instead of mixing paint, you layer wool fibres to create soft transitions. This technique gives your needle felted pictures a dreamy, lifelike quality.
Note: If you want to know how to use your felting needle for blending, try using just the tip of the needle. Light pokes help you attach thin layers without making holes.
Adding Details
When you reach the final stage, it’s time to add details that make your needle felt art stand out. Fine lines, sharp highlights, and tiny textures bring your portrait to life. Here’s how to add details with confidence:
Switch to a finer needle, like a 40 or 42 gauge. This helps you create small marks and smooth the surface.
Felt at a shallow angle, about 45 degrees, to avoid making big holes.
Use spiral or twisted needles for the smoothest finish. These needles act like tiny drills and blend fibres well.
Roll small amounts of wool between your fingers to make thin lines for eyebrows, eyelashes, or hair strands.
Layer wool carefully. Spread fibres evenly and overlap them a little to avoid lumps.
Use your fingers or a soft brush to smooth out the surface. Gently rub or brush in circles to blend any rough spots.
Trim stray fibres with small scissors for a clean look.
If you see fuzzy spots, you can use a mini iron or hair straightener for a few seconds to flatten them.
Tip: If you want to know how to use your felting needle for fine details, remember to use light, controlled pokes. This keeps your wool painting neat and helps you avoid mistakes.
Needle felting lets you create amazing textures and effects. With practice, you will learn how to needle felt a picture that looks just the way you want. Every time you try a new technique, your needle felt art will improve. Enjoy the process and have fun experimenting with new ideas!
Needle Felting Tips and Finishing
Troubleshooting
Everyone makes mistakes when creating needle felted pictures, especially at the start. Here are some top tips to help you fix common problems:
Why It Happens |
How to Fix or Avoid |
|
|---|---|---|
Using the Wrong Type of Wool |
Some wool is too fine or too coarse for your project. |
Try coarser wool like Corriedale for easier felting. |
Using Too Much or Too Little Wool |
Too much wool makes your art bulky. Too little slows you down. |
Start with less wool and add more as you go. |
Neglecting Safety |
Felting needles are sharp and can poke fingers. |
Use finger guards and work slowly. |
Starting with Complex Projects |
Big projects can feel overwhelming. |
Begin with simple shapes to build your skills. |
Using Incorrect Needling Technique |
Stabbing sideways or too deep can break needles. |
Always poke straight up and down with short, quick motions. |
Being Impatient |
Rushing leads to broken needles and messy art. |
Take your time and enjoy the process. |
Needle breakage happens to everyone. Keep extra needles nearby. Always poke straight in and out, never at an angle. Work on a soft pad and use a light grip. If your wool gets too dense, switch to a finer needle and slow down. These top tips will help you avoid frustration and keep your needle felt art looking great.
Achieving Realism
You can make your portraits look more lifelike with a few simple tricks. Try blending custom colors to match skin tones or hair. Layer thin wisps of wool for soft shadows and highlights. Add your own details, like a favorite scarf or a special background, to make the portrait unique. Some artists use fabric scraps, beads, or even silk fibers for extra texture. If you want sharper lines, work on linen fabric. Don’t be afraid to use bold colors from your wool stash. Patience is key—build up layers slowly to create depth and character. Every artist has their own style, so let your personality shine through your needle felted pictures.
Framing and Care
Finishing your portrait with the right frame keeps it safe and helps it stand out. Plan your frame size before you start. Shadow boxes and custom frames with mat boards work well. Avoid glass, since it hides the soft texture of your art. You can sew your portrait onto mat board or lightly glue it to foam board. For hanging, Velcro strips or dowel rods work for lighter pieces. Always use acid-free materials to prevent yellowing. Keep your art away from direct sunlight and moisture. Store it upright or hanging, not flat. Use cotton covers or archival boxes for long-term care. These steps will help your wool painting last for years and keep it looking beautiful.
Be proud when you finish your wool-painted portrait! Lots of artists enjoy making animal portraits, especially of their pets. These portraits show the animal’s personality. You can also make pictures of birds, flowers, or fruits. Each portrait you make will look unique. You will improve with every new project. Try different ideas and have fun as you work.
Remember, each piece you make is one of a kind. Keep felting and show your creative side! 🐾
FAQ
How long does it take to finish a wool-painted portrait?
You can finish a small portrait in a few hours. Larger or detailed pieces might take a few days. If you watch video tutorials, you can learn faster and avoid common mistakes.
Can I learn needle felting without any art background?
Yes, you can! Many beginners start with no art experience. You can follow video tutorials step by step. These guides show you how to use wool and needles safely.
Where can I find good video tutorials for wool painting?
You can find video tutorials on YouTube, craft blogs, and online art classes. Some artists share free lessons. Others offer paid courses with extra tips. Try searching for "needle felting portrait video tutorials" to get started.
What should I do if I make a mistake while felting?
Don’t worry! You can gently pull off the wool and try again. Many video tutorials show how to fix common errors. Practice helps you get better each time.
Do I need special tools to follow video tutorials?
Most video tutorials use basic tools like felting needles, wool, and a foam mat. Some may suggest extra items, but you can start with simple supplies. You can always add more tools as you learn.