
What Materials Do You Need for Felting Keychains
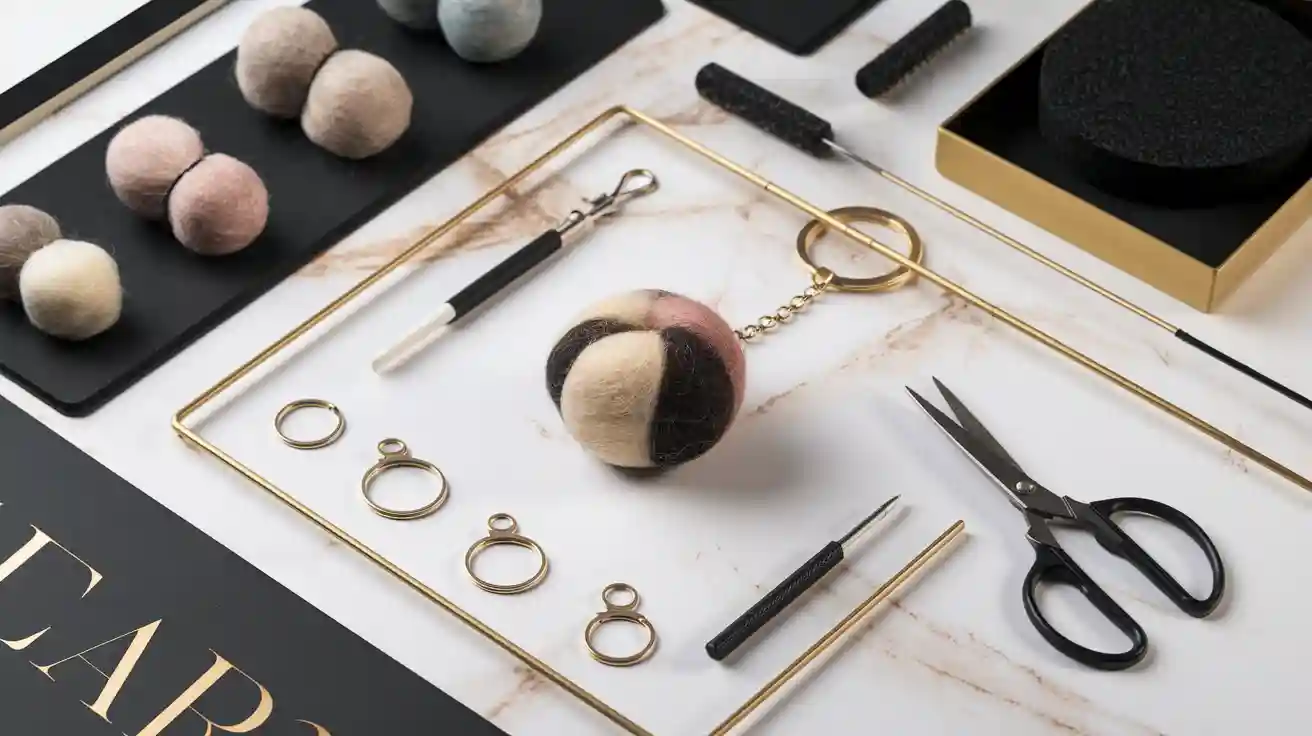
Ready to make your own felting keychain? Grab your needle felting tools and supplies: felting needles, a felting mat, wool, sharp scissors, and keychain hardware. Good supplies make needle felting easier and more fun. You can find extra tools and supplies for comfort and safety, too. Picking the right materials helps your felting project look polished. If you want a step-by-step tutorial, brands like Pawimprint show how expert supplies turn a simple keychain into a keepsake.
Key Takeaways
Pick the right felting needles and mats for your project. Start with big needles to shape your wool. Use small needles for adding details. Mats help protect your work and your hands.
Choose good wool like Merino or Corriedale. This makes your keychains firm and neat. Put core wool inside and roving on the outside. This gives the best look.
Keep your tools sharp and safe. Use finger guards to protect your fingers. Always work on a felting mat to stop injuries.
Pick strong key rings and hardware for your keychain. This helps your keychain last long and be easy to use.
Make your keychain special with beads, embroidery, or fabric markers. These things help your keychain stand out.
Felting Keychain Tools
When you start a felting keychain project, you need the right needle felting tool for each step. Let’s look at the main tools you’ll use and how they help you create a cute and sturdy keychain.
Felting Needles
Felting needles are the heart of any needle felting project. These special needles have tiny barbs along the shaft. When you poke wool with a felting needle, the barbs catch the fibers and tangle them together. This is how you shape and firm up your wool.
You’ll find felting needles in different sizes and types. The size number works in reverse: a smaller number means a bigger needle. For example, a size 6 needle is larger than a size 10. Larger needles work fast and help you shape the wool quickly. They are great for the first steps of your felting keychain. Smaller needles have finer barbs. They let you add details and smooth the surface. When you make a keychain, you might start with a coarse needle to build the shape, then switch to a fine needle for the finishing touches. Using the right needle size helps you avoid big holes and keeps your keychain looking neat.
You can also find needle felting tool sets that include several needle sizes. This gives you more control over your project. If you want to work faster or add more detail, try using a multi-needle felting tool. It holds several needles at once and helps you cover larger areas.
Felting Mat
A felting mat protects your table and your needles. It gives you a soft but firm surface to work on. You have a few choices when picking a needle felting mat. Each type has its own strengths.
Material Type |
Durability |
Features and Suitability |
|---|---|---|
Foam/Sponge Pad |
Needs replacing |
Lightweight, affordable, great for beginners |
Brush-Type Work Pad |
Long-lasting |
Smooth surface, good for big or complex projects |
Wool Needle-Punched Felt Mat |
Very durable |
Eco-friendly, comfy, best for pros and long-term use |
Foam mats are light and easy to use. They work well for small felting keychain projects. Brush mats last longer and give you a smooth surface, which helps if you flip your work a lot. Wool mats cost more at first, but they last for years and feel great to use. Many experienced needle felting artists prefer wool mats for their comfort and quality.
Scissors and Pliers
You’ll need sharp scissors to trim wool, cut thread, or snip off any loose bits. Small, pointed scissors work best for detailed work on your keychain. Pliers help you attach the keychain hardware. They let you open and close jump rings or key rings without hurting your fingers. If you want your needle felting tool kit to feel complete, add a pair of small pliers.
Tip: Keep your scissors and pliers just for crafting. This keeps them sharp and ready for your next needle felting project.
Optional Tools for Comfort and Safety
Some needle felting tools make your work safer and more comfortable. Finger protectors or leather finger guards keep your fingers safe from accidental pokes. Needle holders and grips help you hold the needle more easily, especially if you work for a long time. High-density felting mats last longer and feel better under your hands. These extras are not required, but they can make your felting keychain experience much more enjoyable.
Tool |
Purpose/Benefit |
Notes |
|---|---|---|
Leather Finger Guards |
Protect fingers from needle pokes |
Great for beginners |
Needle Holders/Grips |
Make holding needles easier |
Useful for long sessions |
High-density Mat |
Durable, comfortable felting surface |
Lasts longer than foam mats |
With the right needle felting tool, you can shape, smooth, and finish your felting keychain with confidence. Try different tools to see what feels best for you. The right setup makes needle felting fun and safe, so you can focus on creating a keychain you’ll love.
Needle Felting Materials
When you start a felting keychain, the materials you choose make a big difference. Let’s break down what you need for a fun and successful project.
Wool Roving and Batting
Wool is the main ingredient in needle felting. You will see two main types: roving and batting. Wool roving feels soft, fine, and compact. It works great for needle felting because the fibers have tiny scales. When you poke the wool with a needle, these scales lock together. This lets you shape detailed designs, like a felt ball fox keychain or a chick keychain, with ease. Natural wool roving is perfect for sculpting small, firm shapes that hold up well on a keychain.
Wool batting looks fluffier and less dense than roving. It works best as a base or filler. You can use batting inside your felt ball or chick keychain to give it volume. Then, cover it with a layer of natural wool roving for a smooth finish. Cotton batting does not work the same way. It lacks the scales that help wool fibers stick together, so it cannot hold detailed shapes for needle felting. Always pick wool for your felt ball fox keychain or chick keychain if you want crisp details.
Core Wool and Pre-felt
Core wool is another helpful material. It is usually less processed and costs less than roving. You use core wool to build the inside of your felt ball or chick keychain. This saves your best wool for the outside. Core wool felts quickly, so you can shape the base fast. After you finish the core, add a layer of roving to get a smooth, colorful surface.
Pre-felt is wool that has been lightly felted. It comes in sheets and helps you add flat shapes or backgrounds to your keychain. You can cut pre-felt into small pieces and needle them onto your felt ball fox keychain or chick keychain for extra detail.
Tip: Use core wool for the inside and natural wool roving for the outside. This gives your keychain a firm shape and a soft, smooth finish.
Key Rings and Hardware
You want your keychain to last. That means picking strong hardware. Galvanized metal key rings with a flat profile work best. These rings hold up to daily use and keep your felt ball fox keychain or chick keychain secure. The flat design grips the wool better, so your keychain does not slip off. Many crafters use 25 mm metal rings because they are sturdy and easy to attach.
You can also find small chains, lobster clasps, or jump rings. Use pliers to open and close them. Good hardware keeps your needle felting project looking neat and lasting longer.
Hardware Type |
Best Use |
Durability |
|---|---|---|
Flat Metal Key Ring |
Everyday keychains |
Very durable |
Lobster Clasp |
Removable keychains |
Durable |
Jump Ring |
Attaching charms or extras |
Durable |
Fabric Glue
Sometimes you need to attach small parts or hardware that you cannot sew. Fabric glue helps here. Tacky glue works well for felt. It is safe, non-toxic, and dries clear. You can use it to stick on tiny details, like eyes or noses for your chick keychain. Press the pieces together and wait about 15 minutes for the glue to set.
Hot glue is another good choice, especially for bigger or stiffer items. High-temperature hot glue gives you more time to adjust before it sets. Be careful not to burn yourself or leave glue lumps. Both tacky glue and hot glue hold wool and hardware in place, so your felt ball fox keychain or chick keychain stays strong.
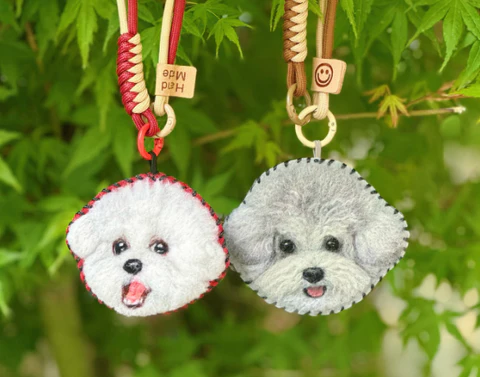
If you want your project to look as polished as Pawimprint’s custom wool felt portraits, use premium materials. Pure wool, strong hardware, and the right glue make your needle felting project last longer and look more professional.
Felted Daisy Keychain Extras
When you want to make your felted daisy keychain stand out, extras can help you get creative. These little touches turn simple felt ball crafts into something special. Let’s look at some fun ways to finish and personalize your keychain.
Embellishments
You can add all sorts of decorations to your felted daisy keychain. Try sewing on tiny beads for a sparkly center. Use craft eyes if you want your chick keychain to look cute and lively. Embroidery thread lets you stitch on petals, faces, or even a tiny smile. Some people glue on sequins or small charms. These extras make your felt ball fox keychain or chick keychain unique.
Tip: Mix and match beads, thread, and craft eyes to create a keychain that shows off your style.
Stuffing and Thread
Stuffing helps your felt ball keep its shape. You can use a bit of extra wool or even a small amount of polyester fiberfill inside your felt ball. This makes your felted daisy keychain feel soft and sturdy. Strong thread is great for attaching petals or hanging your chick keychain from the key ring. Embroidery thread comes in many colors, so you can pick one that matches your design.
Here’s a quick list of what you might use:
Wool or fiberfill for stuffing
Embroidery thread for details
Strong sewing thread for attaching parts
Markers and Storage
Fabric markers let you draw tiny details on your felt ball. You can add faces, dots, or even write a name. Markers work well for both the felted daisy keychain and chick keychain. When you finish your felt ball crafts, keep them safe in a small storage box or container. This protects your keychains from dust and keeps them looking new.
Extra Item |
Use |
|---|---|
Fabric markers |
Draw faces or details on felt ball |
Storage container |
Keep keychains safe and organized |
Adding these extras makes every felt ball project one of a kind. Try new ideas and see what you like best!
Choosing Materials
Wool Types
Picking the right wool makes a big difference in your felting keychain project. Not all wool works the same way. Some types felt better and give you a smoother finish. You want wool with lots of crimp, which means the fibers are wavy and stick together well. Fine wools like Merino feel soft and help you add tiny details. Medium-coarse wools, such as Corriedale or Shetland, make your keychain strong and sturdy. Blended wools give you a mix of softness and strength. Always check the label for the breed and how the wool was processed. Avoid superwash wool because it will not felt. If you want the best results, look for pure wool like the kind Pawimprint uses in their keepsakes.
Tip: Locally sourced wool from small farms often gives you better quality and consistency.
Color Options
Color brings your keychain to life. You can find wool in almost any shade, from bright yellow to soft gray. Some kits offer a sampler with many colors, so you can mix and match for your own style. If you want a realistic look, pick natural shades. For fun designs, try bold or pastel colors. You can even blend two colors together by pulling the fibers apart and mixing them before you start felting. This helps you create unique patterns and effects.
Safety Tips
Felting needles are sharp and can hurt if you are not careful. Always poke the needle straight up and down to keep it from breaking. Use a foam mat or wool pad under your project to protect your hands and your table. Never hold the wool in your palm while felting. Start with small amounts of wool so you can control the needle better. Many crafters wear leather finger guards or finger cots on the hand holding the wool. This helps prevent painful pokes. Wipe your needle clean before you start, and use a handle if you want a better grip.
Note: The most common injury is stabbing your finger with the needle. Stay focused and work slowly to keep your hands safe.
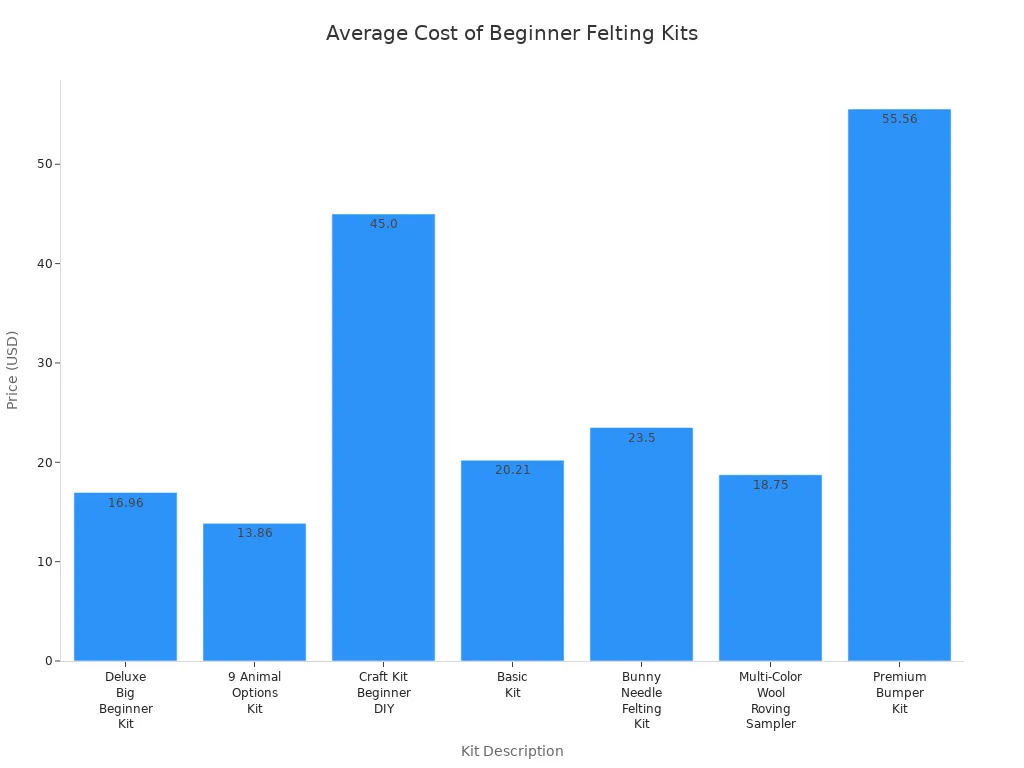
Budget Choices
You do not need to spend a lot to start felting. Beginner kits usually cost between $15 and $25. These kits include basic wool, a few needles, and simple instructions. If you want more colors or better tools, you can find premium kits that cost more. Premium kits use soft, natural wool and strong steel needles. They help you make smoother, more detailed keychains. Budget kits are great for learning and quick projects. Premium kits, like those from Pawimprint, are perfect for gifts or keepsakes.
Kit Type |
Price Range |
Best For |
|---|---|---|
Budget |
$15-$25 |
Beginners, quick crafts |
Premium |
$30-$100+ |
Gifts, keepsakes |
Try different materials and tools to see what you like best. The right choices help you create a keychain you will love and keep for a long time.
Here is a simple list of what you need for your felting keychain kit:
Wool roving or batting (Merino or Corriedale is best)
Felting needles (use a few different sizes)
Felting mat (foam, wool, or brush type)
Scissors and pliers
Key rings and hardware
Fabric glue
Finger guards, decorations, and storage (these are optional)
Many beginners use the wrong wool or forget finger guards. Pick good supplies and keep your hands safe. If you want ideas or the best materials, look at brands like Pawimprint. They make beautiful and strong keepsakes!
Tip for Sourcing |
Why It Matters |
|---|---|
Wool stays the same quality |
|
Quality control |
Fewer mistakes, better crafts |
FAQ
How long does it take to make a felting keychain?
You can finish a simple felting keychain in about 30 to 60 minutes. If you add lots of details or extras, you might need more time. Take your time and enjoy the process.
Can I make a felting keychain if I am a beginner?
Yes, you can! Felting keychains are great for beginners. Start with a basic shape. If you want more help, try following a step-by-step tutorial online or in a kit.
What kind of wool should I use for keychains?
Choose pure wool roving or batting. Merino and Corriedale work well. These types felt easily and hold their shape. Avoid synthetic fibers because they do not felt properly.
How do I attach the key ring to my felted piece?
Use small pliers to open the jump ring or key ring. Push it through the felted wool. Close the ring tightly. Make sure your felted piece is firm so it stays secure.
How do I keep my felting needles from breaking?
Always poke the needle straight up and down. Do not bend or twist it. Use a felting mat under your project. Work slowly and keep your hands steady.