
How to Create 3D Acrylic Glass Watercolor Pet Portraits at Home
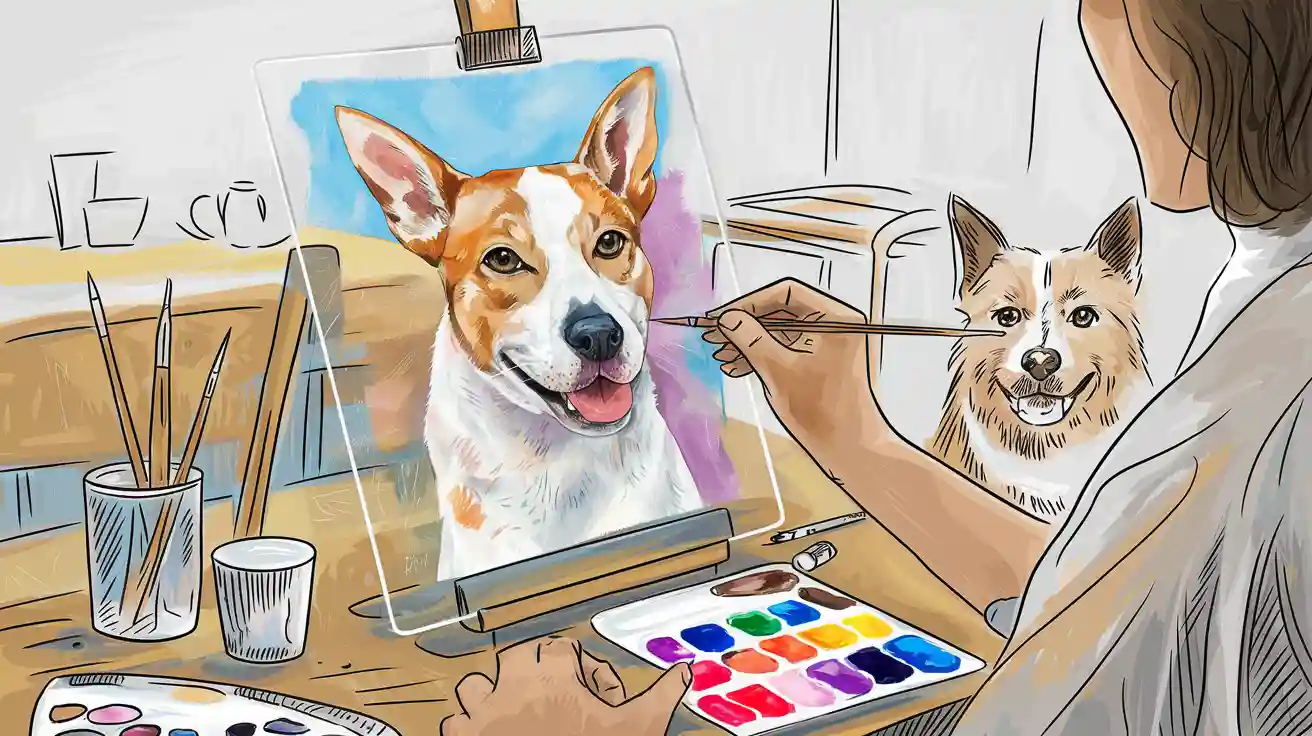
You can create amazing 3D Acrylic glass watercolour pet portraits right at home. This project uses clear acrylic glass sheets and a reverse painting technique. You paint details on different layers, which gives your pet’s portrait a cool 3D look. Grab your favorite photo of your pet, some paint, and give it a try! You do not need to be a pro artist to enjoy this fun and creative process.
Key Takeaways
Use clear acrylic sheets and special acrylic paint markers to create bright, lasting pet portraits with a 3D effect.
Choose a sharp, well-lit photo of your pet to guide your painting and help capture important details.
Paint in reverse on the back of the acrylic, starting with small details and layering backgrounds last for depth.
Stack multiple painted acrylic sheets with spacers between them to build a strong 3D look that makes your pet pop.
Keep your workspace clean and use proper tools and safety steps to make your painting process smooth and fun.
Materials
Acrylic Glass Sheets
You want to start with clear acrylic sheets. These sheets work best for 3D art because they look like glass but are much safer and lighter. You can find acrylic sheets in many thicknesses, from about 1 mm (which is very thin) up to 100 mm (which is super thick). Most people use sheets that are 2 mm to 5 mm thick for art projects at home. Thicker sheets help you create more layers and a stronger 3D effect. If you feel creative, you can also try colored acrylic sheets or special types like light-diffusing acrylic.
Tip: Ask your local hardware store to cut the sheets to the size you want. This saves you time and helps you get clean edges.
Paints and Markers
You need paints and markers that stick well to smooth surfaces. Water-based acrylic paint markers work great on acrylic glass. Brands like Krink K-55, Pebeo, and Posca make markers that give you bright, bold colors. These markers dry fast, don’t smell, and last a long time. You can also use brands like Kaywin, Artistro, Sakura Pen-Touch, Molotow, Montana Cans, Sharpie, and Liquitex. These markers cover well, dry quickly, and are safe to use indoors.
Reference Photo
Pick a clear, high-quality photo of your pet. The photo should show your pet’s face and main features. A good photo helps you see all the details you want to paint. Try to choose a picture with good lighting and sharp focus.
Tools and Accessories
Here’s a handy list of extra things you’ll need:
Fine-tip paintbrushes for details
Painter’s tape for clean edges
Cotton gloves to keep fingerprints off the acrylic
Ruler and pencil for measuring and marking
Paper towels for quick clean-ups
Spacers or foam pads to separate layers and add depth
Note: Keep your workspace clean and dust-free. Dust can stick to the acrylic and mess up your painting.
Step-by-Step
Workspace Prep
Before you start painting, set up your workspace for safety and comfort. You want a clean, flat surface with good lighting. Keep your acrylic glass sheets away from dust and dirt. Here are some important safety tips to follow:
Open a window or use a fan for good ventilation. Acrylic paints can have small amounts of chemicals that may bother your nose or skin.
Put on goggles and a protective apron if you plan to use any strong cleaners or ammonia.
Never eat, drink, or smoke in your painting area.
Keep an eyewash bottle nearby if you use any strong chemicals.
Do not use your mouth to shape or point your paintbrushes.
A tidy, safe workspace helps you focus on making your 3D Acrylic glass watercolour pet portraits look amazing.
Photo Selection
Picking the right photo is a big step. The photo you choose will guide your whole project. Here’s how to pick the best one:
Look for a photo with bright colors and strong contrast. This makes your pet stand out on the acrylic glass.
Choose a picture with good lighting. Clear, sharp photos work best.
Match the photo’s shape (vertical, horizontal, or square) to your acrylic sheet.
Use a high-resolution image. Blurry photos lose detail when you paint.
Think about the thickness of your acrylic glass. Thicker sheets make colors pop and add depth.
If your acrylic has a black backing, it will help colors look even brighter.
A great photo makes your 3D Acrylic glass watercolour pet portraits shine.
Outlining
Now it’s time to get your pet’s features onto the acrylic glass. Outlining helps you paint with confidence. Try this simple method:
Print your chosen photo so it almost fills a regular sheet of paper.
Place the photo on your acrylic glass where you want the portrait to go.
Slide a piece of graphite paper under the photo.
Trace the main shapes—eyes, nose, ears, and fur direction—using a pencil.
Lift the paper to see your outline on the acrylic.
Go over the lines with a fine-tip marker or pencil if you want them to stand out more.
This outline will guide you as you paint each layer.
Reverse Painting
Reverse painting is a special technique. You paint on the back of the acrylic glass, not the front. This means you start with the details and finish with the background. Here’s how it works:
Begin by painting the smallest details first, like your pet’s eyes and nose.
Add the next layer, such as fur or markings.
Paint the background last.
Let each layer dry before adding the next one. Acrylic paint usually dries in 20-30 minutes, but it might take longer if the air is humid.
Be patient. Waiting for each layer to dry keeps your colors bright and stops them from mixing together.
Reverse painting makes your artwork look deep and shiny. The glass protects your painting and adds a cool 3D effect.
Tip: Use painter’s tape to keep your edges neat and straight.
Layering
Layering is what gives your portrait its 3D look. You can use more than one acrylic sheet to build up different parts of your pet’s face or background. Each sheet adds depth and makes your art pop.
Paint different features on separate sheets. For example, put the eyes and nose on the first sheet, fur on the second, and the background on the third.
Let each painted sheet dry completely before stacking them.
Use foam or plastic spacers between the sheets. Spacers keep the layers apart and stop them from sticking together. They also make the 3D effect stronger.
Choose acid-free, archival-quality spacers to keep your art looking good for years.
When you look through the stacked sheets, your pet seems to jump out from the background!
Assembly
Putting your portrait together is the final step. This part takes a steady hand and a little patience.
Stack your painted acrylic sheets in the right order.
Place spacers or foam dots at the corners and in the center to keep the layers even.
If you use glue, apply it carefully. Too much glue can leave bubbles or fingerprints that you can’t remove.
Try using mechanical fasteners like screws or standoffs instead of glue. These hold the sheets together without making a mess.
If you must use glue, apply it in an X pattern to avoid bubbles. Hide glue lines behind painted areas if possible.
Wipe away any dust or fingerprints before sealing the layers.
Once you finish, your 3D Acrylic glass watercolour pet portraits will look bright, colorful, and full of life. You’ll love how the layers and light make your pet’s image stand out!
3D Acrylic Glass Watercolour Pet Portraits Tips
Layering Techniques
Layering is the secret to making your pet portrait look real and full of life. You want to start with a strong base. Try using the grid method to sketch your pet’s face. This helps you get the right size and shape. Seal your sketch with a mix of matte medium and gesso so it stays put. Next, pick natural colors like raw umber, burnt sienna, and some blues for shadows and backgrounds.
Here’s a simple way to build up your layers:
Mix your paint with matte medium. This makes the paint see-through, so each layer shows what’s underneath.
Use a flat brush for big areas and a detail brush for small spots like eyes or whiskers.
Paint in thin, smooth layers. Let each one dry before you add the next. This keeps your colors bright and stops them from mixing together.
Add darker glazes slowly to build up shadows. Use light, soft strokes around the edges for a gentle look.
Finish with a thin glaze of burnt sienna or raw umber. This pulls all the colors together and makes your portrait pop.
Tip: If you’re new to this, start with simple shapes and work your way up to more details.
Avoiding Mistakes
Everyone makes mistakes, but you can dodge the big ones with a few easy tricks:
Mix enough paint before you start. Acrylic dries fast, so you don’t want to run out halfway through.
Use enough paint for good coverage. Thin paint can look patchy.
Mix your colors in small circles on your palette. This keeps them from getting muddy.
Clean your brushes right after you finish. Don’t leave them sitting in paint.
Start with light colors and build up to dark ones. This helps you fix mistakes as you go.
Try different brushes, but a round brush works well for most things.
Wash your tools when you’re done. This keeps them in good shape for next time.
Note: Always let each layer dry before adding another. This keeps your 3D Acrylic glass watercolour pet portraits looking sharp.
Achieving Depth
You want your portrait to look like it jumps off the glass. Here’s how you can do that:
Begin with a light base layer. Add darker colors slowly to build shadows and shape.
Mix your own black using ultramarine blue and burnt umber. This gives you rich, deep shadows.
Look at your photo and notice where the light and dark spots are. Use thin brushstrokes to copy the fur’s texture.
Glaze with thin, see-through layers. This makes the colors blend smoothly and adds depth.
Work on the background and the pet at the same time. This keeps everything balanced.
Add highlights last with a small brush. These little touches make your pet’s eyes and nose shine.
For a super cool finish, ask for diamond-polished edges on your acrylic sheets. These edges are smooth and clear, making your art look even more 3D and bright. Light will bounce through the edges, making your portrait glow.
Tip: Diamond-polished edges also help your artwork last longer and look fancy.
Display and Care
Framing
You want your pet portrait to look its best, so picking the right frame matters. Here are some popular options you can try at home:
Personalized floating frames make your artwork look like it’s floating in mid-air. This style gives a modern, clean vibe and lets the edges of your acrylic glass show.
Acrylic shadowbox displays add even more depth. You can combine your painted layers with printed photos or keepsakes for a cool, 3D effect.
Vintage-inspired frames work well if you love a classic or cozy look. These frames fit in with traditional or eclectic home styles.
Custom framed art lets you choose wood for warmth or metal for a sleek, modern feel. Look for UV-protective glass and acid-free mats to help your portrait last longer.
Tip: Try mixing frame styles or matching frame colors to your pet’s fur for a fun, personal touch.
Lighting
Good lighting makes your portrait pop. Place your artwork where it gets soft, indirect light. Direct sunlight can fade colors over time, so avoid hanging your portrait right by a window. If you want to highlight your art, use LED picture lights or spotlights. These lights stay cool and won’t damage the paint or acrylic. You can also use adjustable lamps to control the brightness and angle.
Note: Soft, even lighting helps show off the 3D layers and keeps your colors looking bright.
Maintenance
Acrylic glass art can last for decades if you take care of it. Many artists have seen their acrylic glass pieces stay beautiful for over 30 years. Acrylic is tough and less likely to crack than canvas, but it does attract dust and fingerprints. Here’s how you can keep your portrait looking fresh:
Frame your art behind acrylic glass to protect it from dust, UV rays, and pollution.
Use a soft, dry microfiber cloth to gently wipe the surface. Avoid water or cleaning sprays, since these can damage the paint.
Keep your portrait away from heat sources, as acrylic paint can soften with too much warmth.
Store your art in a dust-free spot with stable temperatures.
Alert: Never use harsh cleaners or too much pressure. Acrylic paint can scratch or fade if you’re not careful.
You now know how to create 3D Acrylic glass watercolour pet portraits at home. Start with your favorite pet photo, outline the features, paint each layer, and stack the sheets for a cool 3D effect. With a little patience and creativity, you can make art that pops!
Ready to show off your masterpiece? Share your 3D Acrylic glass watercolour pet portraits and let others see your amazing results! 🐾
FAQ
How do I fix mistakes on acrylic glass?
If you make a mistake, let the paint dry. Use a cotton swab with a little rubbing alcohol to gently wipe away the error. Be careful not to scratch the acrylic. Try again once the area is clean and dry.
Can I use regular watercolor paints?
No, regular watercolors do not stick well to acrylic glass. You need acrylic paint markers or acrylic paints. These paints stay on the surface and look bright. Watercolors will bead up and wipe off easily.
How many layers should I use for a 3D effect?
You can use two or three layers for a nice 3D look. More layers add extra depth. Try painting details on the front sheet and backgrounds on the back sheets. Use spacers between each layer for the best effect.
What if I do not have spacers?
You can use small foam pads, rubber washers, or even thick cardboard pieces as spacers. Place them at the corners to separate the sheets. This helps create the 3D effect and keeps your artwork safe.