
Essential Tips for Caring for Needle Felted Creations

You want your needle felted creations to stay beautiful for years. Simple habits like gentle handling, safe cleaning, and the right display make a big difference. Many people new to needle felting for beginners forget to use a felting cushion or choose the wrong needle, which can cause damage. If you stab the wool too deep or use the wrong type, your project may look fuzzy or unfinished. With a little care, you can enjoy your needle felting art and keep it looking its best.
Key Takeaways
Be gentle with your needle felted creations. This helps keep their shape and look. Use a soft touch when you move or fix them.
Clean your felted art often with a soft brush or compressed air. This helps it stay clean. Do not use rough cleaning ways. These can hurt the wool.
Keep your creations in a safe, dry spot. Make sure pets and sunlight do not reach them. This stops damage and fading as time goes on.
If your felted piece changes shape, fix it gently. Use a felting needle and good wool. Take your time for the best results.
You can use digital photo frames to show your art. This way, you do not worry about dust or sunlight. It keeps your creations safe and lets you display them nicely.
Care Basics for Needle Felting for Beginners
Why Gentle Handling Matters
When you start needle felting for beginners, you might feel excited to shape and poke the wool. It feels soft and fun to work with, but gentle handling is very important. Wool fibers lock together when you use pressure and moisture. This process is called "felting." If you press too hard or handle your project roughly, the wool can shrink or lose its shape. You might notice your creation looks squished or uneven. Fixing this takes extra time and effort.
You want your needle felting for beginners projects to keep their original look. Each time you touch or move your felted art, use light hands. Try not to squeeze or bend the wool too much. This helps the fibers stay in place and keeps your project looking neat.
Tip: Always use a soft touch when shaping or moving your needle felted creations. If you need to adjust something, do it slowly and carefully.
Different types of wool react in their own ways. Some wool is coarse and felts quickly, while other types are softer and need more time. If you use too much force, even the toughest wool can become misshapen. Heat and moisture also play a role. Warm hands or a humid room can make the fibers move more, so be extra gentle in these conditions.
If you are using beginner kits, you will notice they often include simple shapes and clear instructions. This helps you practice gentle handling from the start. As you get better at needle felting for beginners, you will learn how much pressure to use and when to stop.
Common Damage Risks
Needle felting for beginners comes with a few risks that can harm your creations. The most common problems happen when you or someone else handles the project too roughly. Pets love the soft texture of wool. Cats might bat at your felted animals, and dogs may try to chew them. If this happens, your project can get torn, stretched, or covered in fur and drool.
Here are some common ways needle felting for beginners projects can get damaged:
Dropping your creation on the floor can flatten or dirty the wool.
Squeezing or pulling on small parts, like ears or tails, can make them fall off.
Letting pets play with your felted art can lead to holes, tears, or missing pieces.
Storing your project in a crowded drawer can crush the shape.
You also need to watch out for moisture. If your felted piece gets wet, the fibers can shift or shrink. Too much heat can make the wool stiff or cause it to lose its form. Always keep your needle felting for beginners projects in a safe, dry place.
Note: Beginners often focus on learning how to hold the needle and shape the wool. As you practice, you will get better at protecting your creations from these risks.
If you want to avoid damage, set up a special spot for your needle felting for beginners projects. Use a shelf or a box with a soft lining. Keep them away from pets and small children. This simple step helps your art last longer and look its best.
Cleaning Needle Felting Projects
Dusting Techniques
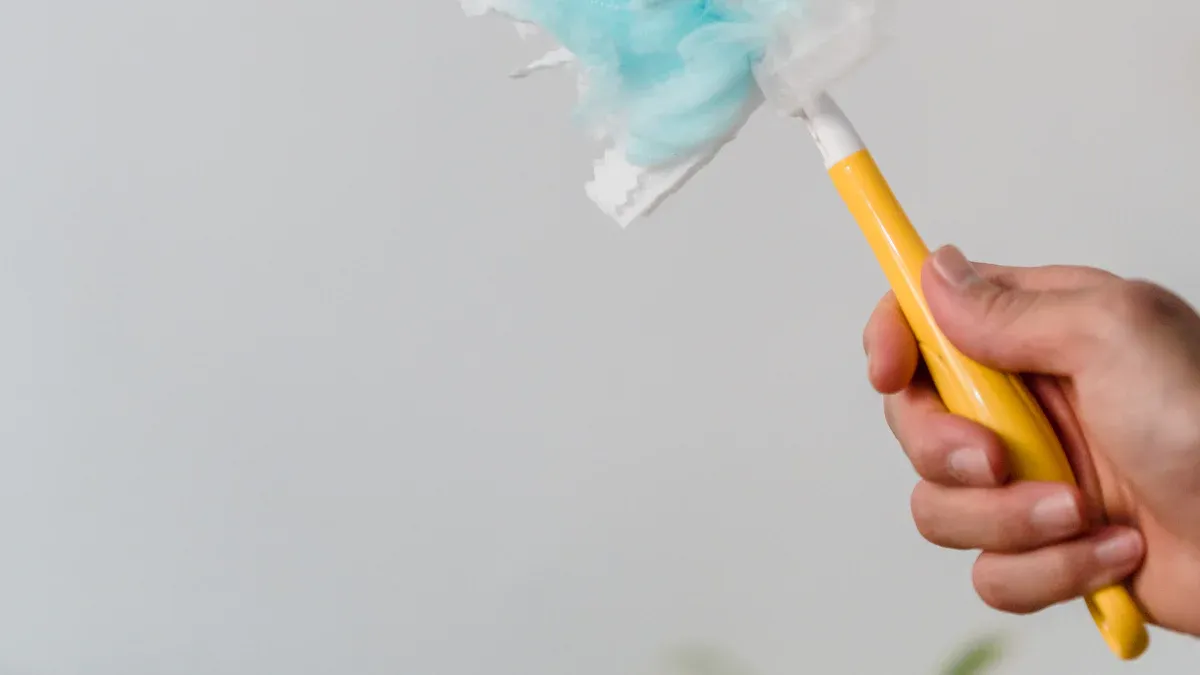
Keeping your needle felted creations clean starts with regular dusting. Wool attracts dust, so you want to remove it gently. Grab a soft brush, like a clean makeup brush or a small paintbrush. Lightly sweep the surface of your felted art. This helps lift away dust without pulling on the fibers.
You can also use a can of compressed air. Hold it a few inches away and give your project a quick burst. This works well for tiny details or hard-to-reach spots. If you see pet hair or lint, try a piece of sticky tape. Press it gently on the wool and lift it off. Never rub or scrub, as this can make the wool fuzzy.
Tip: Dust your needle felted creations every week if they sit out on a shelf. This keeps them looking fresh and bright.
What to Avoid
Some cleaning methods can ruin your wool art. You want to keep your needle felting projects safe, so avoid these common mistakes:
Never soak your felted creations. Soaking can damage the wool and change its shape. This is especially true for larger items like felted animals or sculptures.
Do not use hot water. Heat can shrink the wool and cause it to lose its form.
-
Skip harsh chemicals. The following products can harm your felted art:
Insect repellants
Commercial killers
If you use any of these, you might notice the colors fade or the wool becomes brittle. Always choose gentle cleaning methods.
Note: Keep your felted creations away from direct sunlight and damp places. Sunlight can fade the colors, and moisture can cause mold.
Stain Solutions
Accidents happen. If you spill something on your felted art, act fast. The sooner you treat the stain, the better your chances of saving your project.
Here’s a simple way to handle most stains:
-
Blot the spill right away with a tissue.
Mix a little cold water with mild soap.
Gently rub the stain with your fingers or a soft cloth.
Wipe off any soap with a damp, lint-free cloth.
Press a dry towel on the spot to soak up extra water.
Let your creation air dry.
-
Soak and Squeeze:
Dust off your felted piece first.
Submerge it in cold water (no soap).
Gently squeeze out the water. Don’t twist or wring the wool.
Pat dry with a towel and let it air dry flat.
Professional textile restorers suggest a few extra steps for tough stains:
Figure out what caused the stain before you start cleaning.
Test any cleaning solution on a hidden spot first.
If you need to soak the wool, use lukewarm water and a mild detergent. Avoid scrubbing.
Rinse with cool water and blot gently.
Always dry your felted art flat in a shaded area. Sunlight can make colors fade.
Callout: If you ever feel unsure, ask for help in a needle felting community or group. Many crafters have tips for tricky stains.
With these cleaning tips, you can keep your needle felted creations looking new and bright for years.
Display & Storage
Sunlight and Moisture Protection
You want your needle felted creations to stay bright. Sunlight and moisture can hurt your art. You need to keep your projects safe from both. Here are some easy ways to protect them:
Do not put your felted art in direct sunlight. Sunlight makes colors fade fast.
If you frame your creations, use UV-filtering glass. This glass blocks harmful rays.
Pick LED lights for your display. LEDs do not give off much UV light, so your art is safer.
You should also check the humidity and temperature where you store your art. Look at this table:
Humidity Level |
Temperature Range |
|---|---|
Less than 40% |
59–77 °F (15–25 °C) |
Keep your needle felted pieces in a cool, dry spot. Do not use damp basements or hot attics.
Tip: If your area is humid, use a small dehumidifier in your display room.
Pet Safety
Pets like to play with soft wool. Cats may bat at your felted animals. Dogs might chew them. To keep your art safe, put it on high shelves or inside glass cabinets. You can also use boxes with lids. This keeps pets away and helps your art stay clean.
Using Digital Photo Frames
Do you want to show your needle felted art without worrying about sunlight, dust, or pets? Digital photo frames make it simple! The Pawimprint Digital Photo Frame lets you show photos and videos of your art in great detail. You can upload new pictures from your phone and share them with family far away.
Here’s how digital frames help you:
Advantage |
Description |
|---|---|
Versatility |
Show many kinds of art, not just one piece. |
High-quality display |
Bright screens make your art stand out. |
Remote control |
Change images or settings with a tap. |
Automatic slideshow |
See a gallery of your best work. |
Ample storage |
Store lots of photos and videos. |
Customization |
Add effects or change settings for your style. |
Energy efficiency |
Timers and sensors save power. |
Wireless connectivity |
Upload and share art from your phone or social media. |
Easy maintenance |
No dusting or cleaning needed—your art always looks perfect. |
Let’s compare the Pawimprint Digital Photo Frame to regular displays:
Feature |
Pawimprint Digital Photo Frame |
Traditional Felt Portraits |
|---|---|---|
Display Method |
Digital, many images |
Handcrafted, one image |
Maintenance |
Low |
Moderate (needs dusting) |
Emotional Impact |
Modern, versatile |
Tactile, personal |
Aesthetic Appeal |
Contemporary |
Unique, handmade |
Longevity |
Digital (tech-based) |
Physical (can wear over time) |
You can use digital frames with your regular displays. Take a photo of your newest project and add it to your Pawimprint frame. Now you can enjoy your art at home and share it with friends and family, no matter where they are. This way, your needle felted memories stay safe, bright, and easy to enjoy every day.
Reshaping & Repair
Fixing Misshapen Pieces
Sometimes your needle felted creation loses its shape. Maybe you pressed too hard, or it got squished in storage. You can fix this with a few easy steps. Start with blocking. Lay a clean towel or foam pad on a flat surface. Place your project on top. Use your fingers to gently shape the wool back into place. Let it air dry before you move on.
Here’s a simple way to reshape your art using felting needles:
Pull and prepare the wool. Choose high-quality wool for best results.
Roll the wool tightly into the basic body shape. Compress the fibers as much as you can.
Begin the felting process with a coarse needle. Poke the wool to lock the fibers together and shape the body evenly.
Tip: Work slowly and check your progress often. You want your creation to look smooth and even.
If you use high-quality wool, your project will hold its shape better and feel softer. You can repeat these steps if your piece needs more reshaping.
Repairing Features
Did your felted animal lose an ear or an eye? You can repair features with a few simple tricks. Grab some matching wool. Start by rebuilding the missing part with core wool. Add a colored topcoat to match the rest of your creation.
Here are ways to fix eyes or limbs:
Make a small indentation with your needle where the eye or limb should go.
Insert a plastic safety eye, or poke in colored wool to form the eye.
For limbs, build up the shape with wool, then felt it in place.
Note: Always use gentle pokes to avoid damaging the rest of your project.
If you need help, join online communities. Many groups share skill tips and offer advice. You can find tutorials, workshops, and DIY kits. Some communities even teach visible mending and patching for needle felted art. You’ll find lots of support and ideas for fixing your creations.
You can keep your needle felted creations looking their best with a few simple habits. Handle your art gently, clean it often, and choose safe spots for display. Experts say a strong base and smooth layers help your projects last longer:
Technique |
Description |
|---|---|
Roll core wool tightly and secure with needle pokes. |
|
Layering for Dimension |
Add fine wool in layers for smoothness and depth. |
Smoothing the Surface |
Use a fine needle for a polished finish. |
Remember, patience and practice make a big difference. Many crafters find that spending more time felting leads to firmer, smoother results. You can also use digital photo frames like Pawimprint to share your art with friends and family. Enjoy your needle felting journey and watch your creations shine for years!
FAQ
How do I keep my needle felted creations from getting dusty?
You can dust your creations with a soft brush or a gentle burst of compressed air. Try to display them in a closed cabinet or use a digital photo frame to show off your art without worrying about dust.
Can I wash my needle felted project if it gets dirty?
Avoid soaking your felted art. Spot clean with a damp cloth and mild soap. Gently blot the area and let it air dry. Never twist or wring the wool.
What should I do if my felted animal loses its shape?
You can reshape it by gently pressing the wool back into place. Use your felting needle to poke and firm up the area. Let it rest on a flat surface to dry if needed.
Is it safe to display needle felted art in sunlight?
Direct sunlight can fade colors and weaken fibers. Place your creations in shaded spots or use UV-filtering glass. Digital photo frames like Pawimprint let you enjoy your art without sunlight damage.